How to create a multipurpose Rustic Wheelbarrow
*This post is sponsored by The Home Depot
I’m excited to partner up with The Home Depot today and share how to create a multipurpose rustic wheelbarrow as part of the DIH workshop. #DIHWorkshop
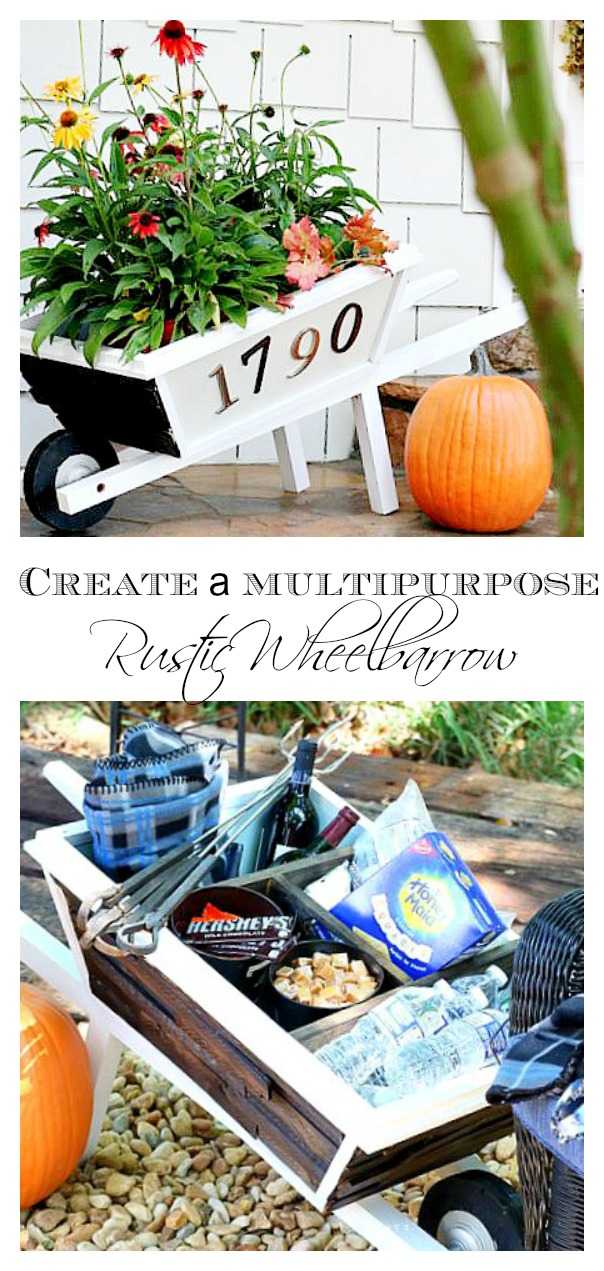
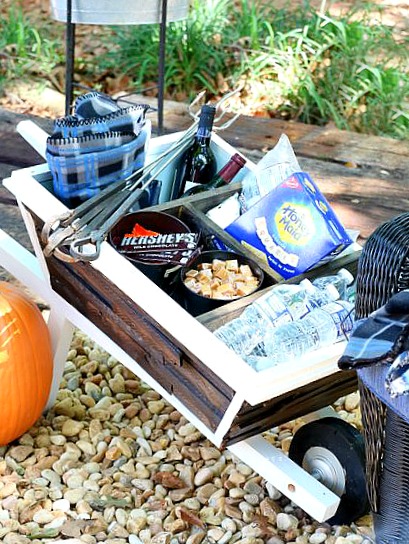
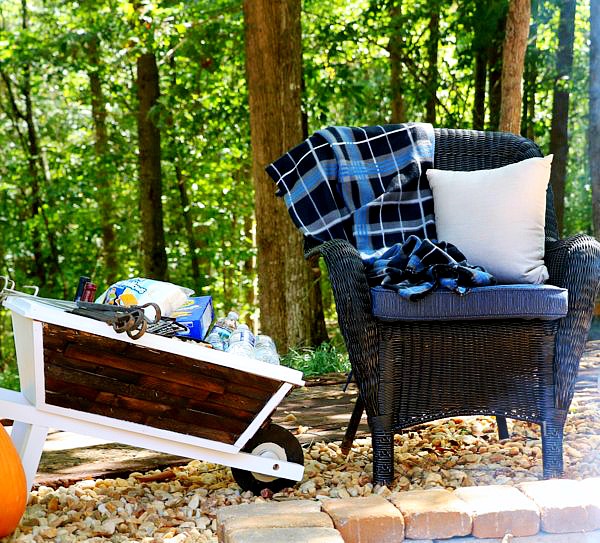
Option 2– Outdoor campfire caddy, which is perfect to hold all the essentials that you will need this fall while you are around the fire.
How to create a multipurpose Rustic Wheelbarrow and materials needed:
Prime Kiln Dried Board 72″ x 2″ x 2″- for wheelbarrow handles
3/8˝ x 48˝Wood Round Dowel – for wheel
1- 24″ x 48″ 1/2″ Birch plywood- used for the barrel
2- 1″ x 2″ x 6 feet of trim
1 – Pack #8 x 1˝ Flat-Head Phillips carpenter screws
1- Wood Shims
1″ nail gun
1- 1″ x 8″ x 6 feet treated wood for wheel and caddy insert
Dark Walnut Stain
House numbers
Exterior paint
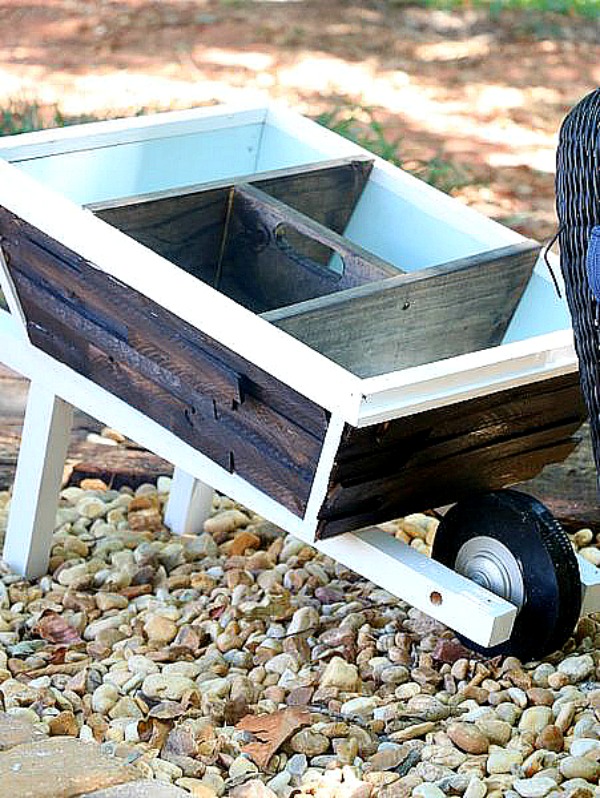
Barrel Construction

Measure and cut the wood for the barrel. The bottom board was cut 12′ x 18″. the two sides were 18′ x “24” and the front and back of the barrel pieces were 12′ x 18″. The sides and front pieces were cut on an angle so that they could all fit together. All of the boards were secured with the nail gun. Tip: make sure your nail gun is aligned at the same angle as your boards or your nails will miss your boards and show….this I know. I painted the inside and outside of my barrel with exterior paint. For the rustic side of the wheelbarrow, I added wood shims with a stapler and stained the boards.For an added finish, trim pieces were cut and secured with a nailer around the top of the barrel. The trim was painted with exterior paint as well.
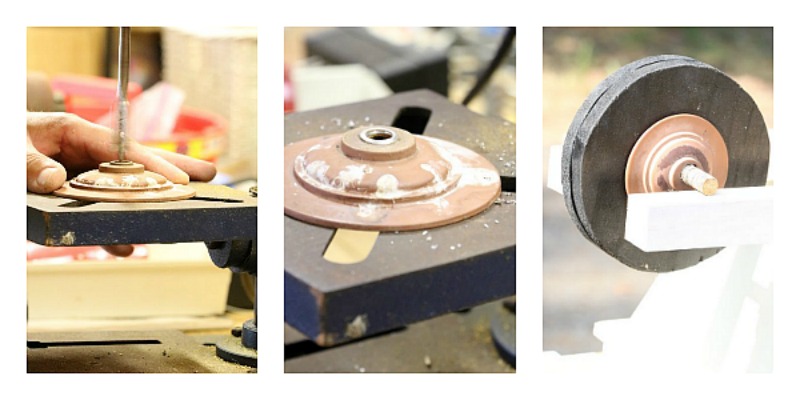
Wheel construction
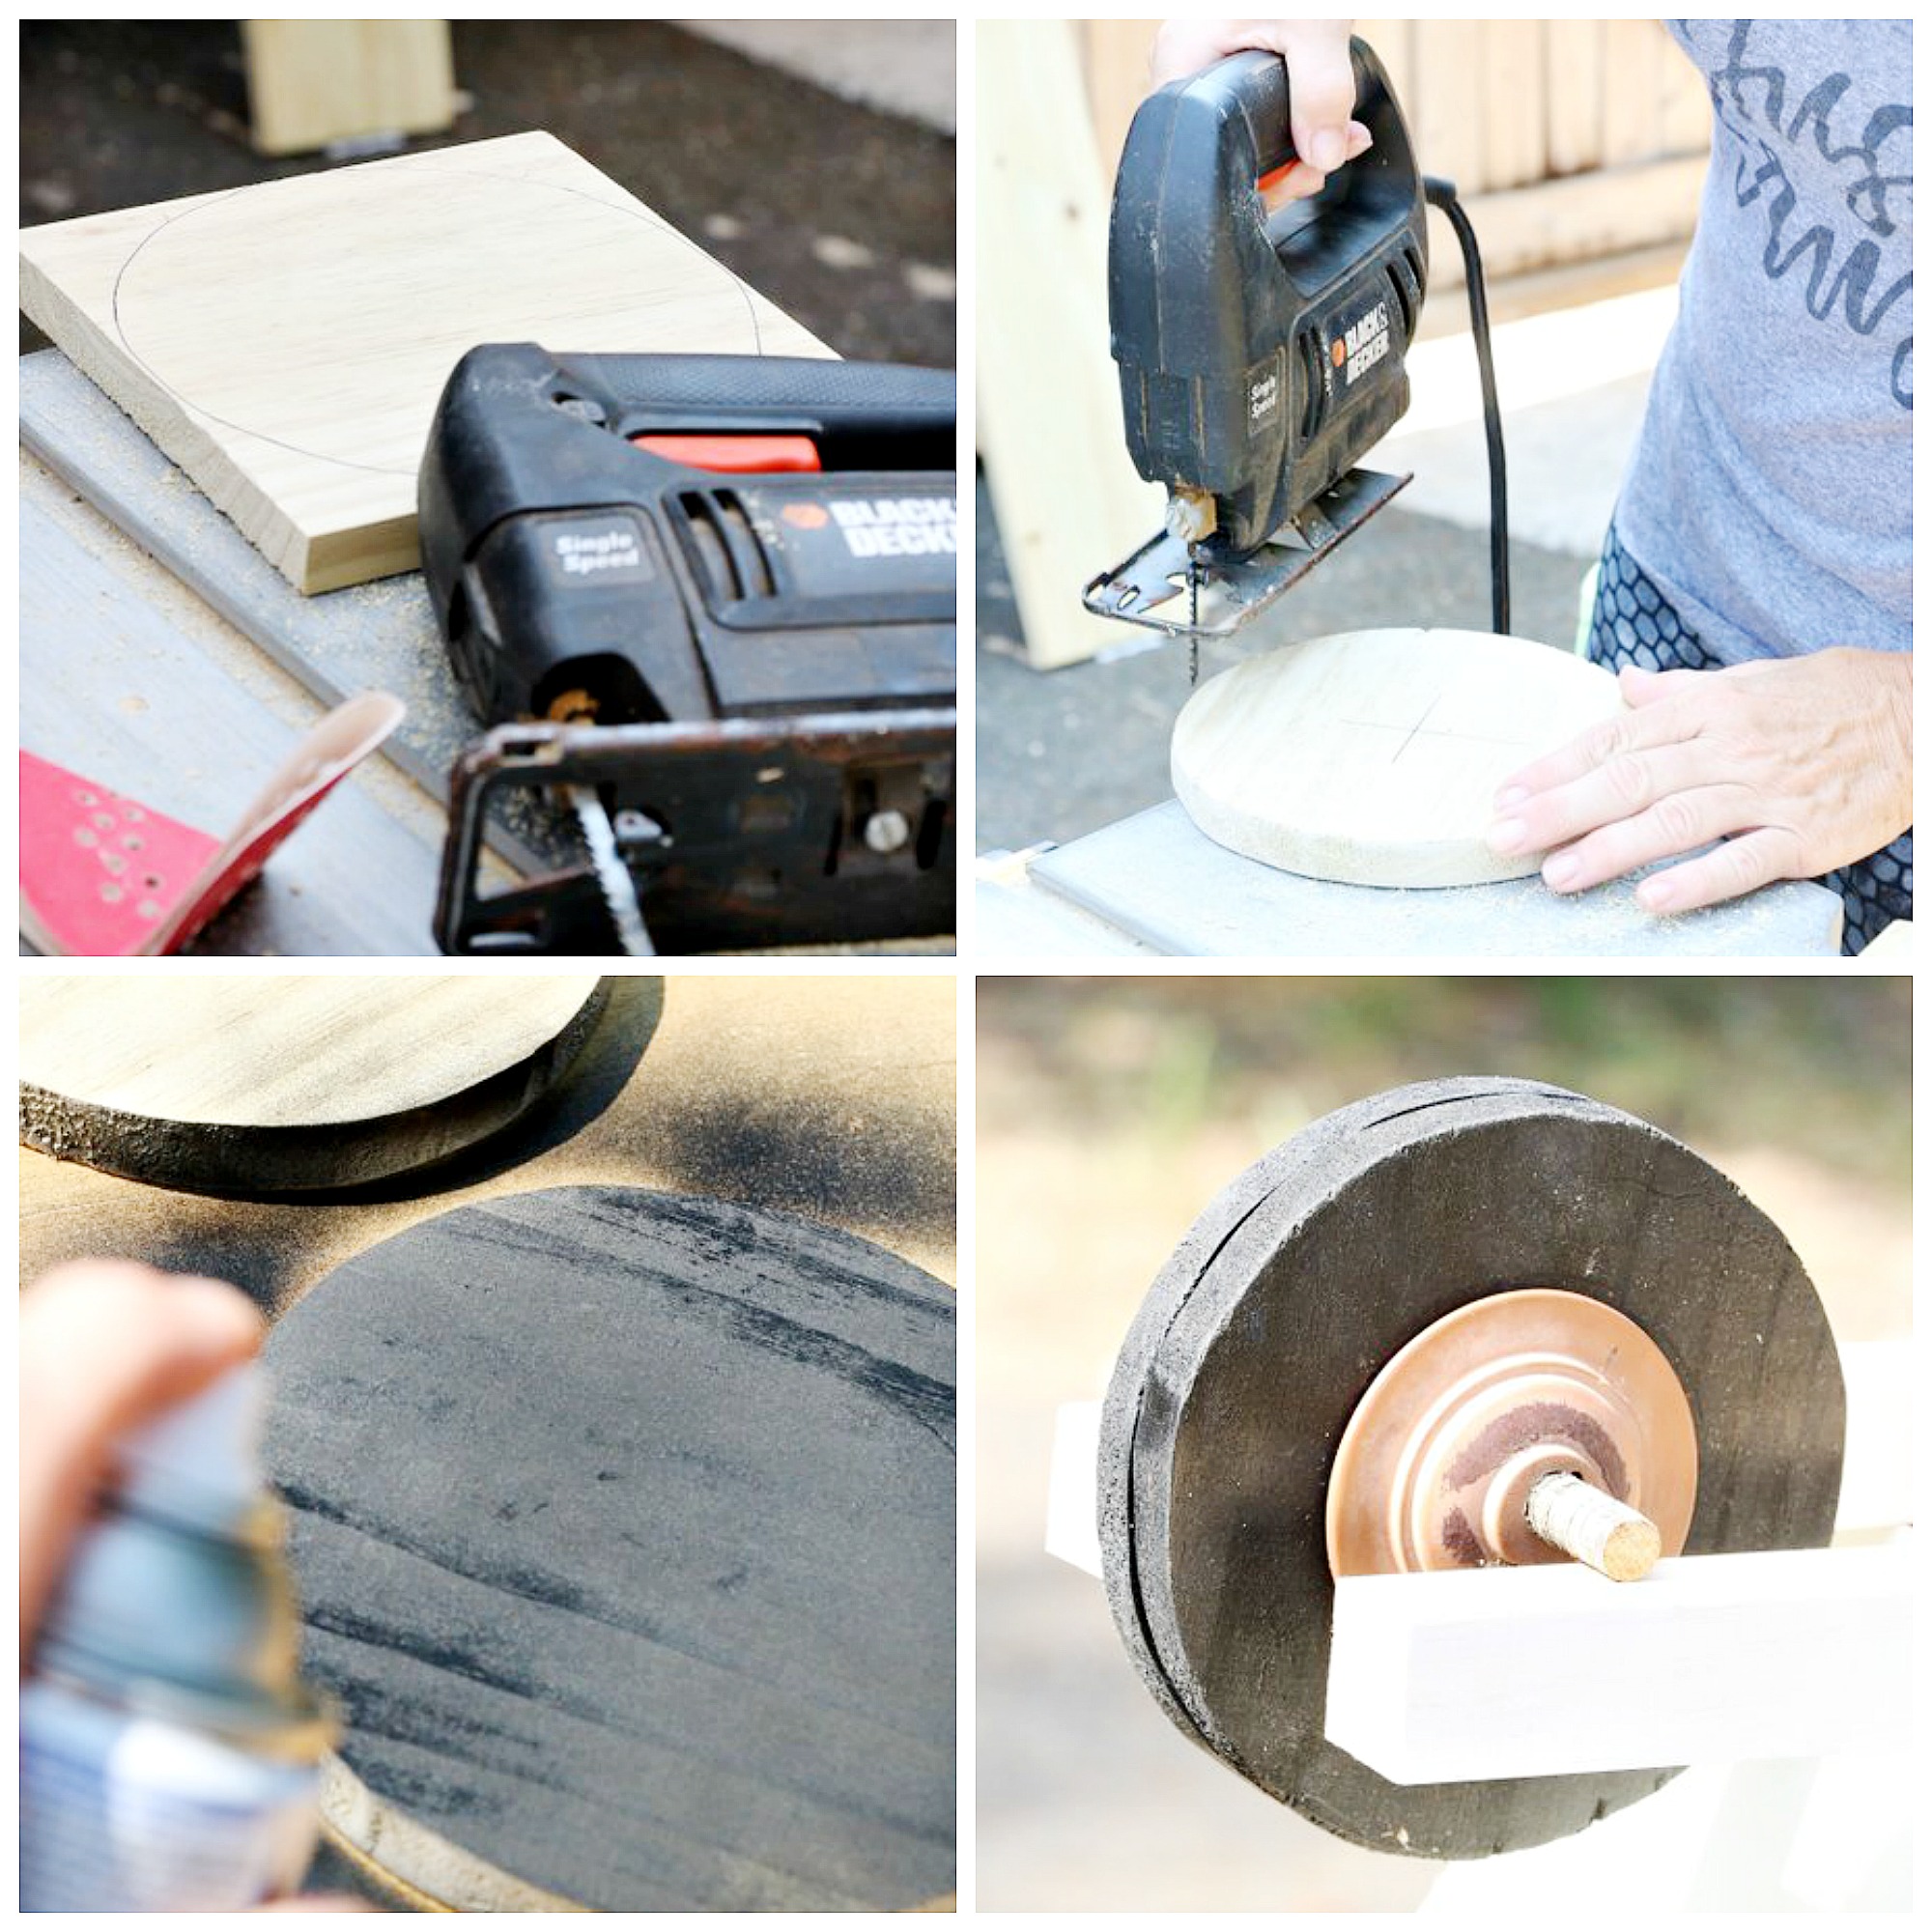
Create a circle template. I used a planter to create my circle. Cut your circles out with a jigsaw. Sand your edges to remove any roughness. Spray paint your wheels. To create dimension and interest, I used pieces for the ‘rim’ of the wheel from an old outdoor light. I applied 2 coats of silver spray paint to the dowel and rim. Drill 3/8″ hole through the center of the wheel and insert the dowel.
Assembling the wheelbarrow
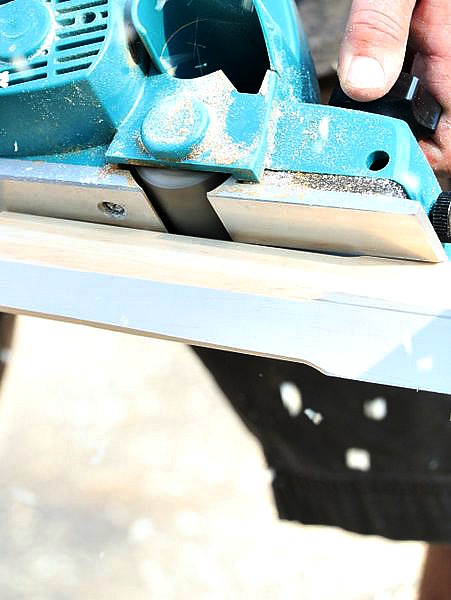
Before assembling the leg pieces I painted them using white exterior paint. Turn your barrel upside down and place the 2″ x 2″ boards on top (which is actually the bottom of the barrel) align and mark to secure. Use carpenter screws to secure handles. To create added interest to the handles, we used a wood planer to notch out handles. I say ‘we’ cause hubby actually handled this, since I have never used a planer before.
Caddy Insert
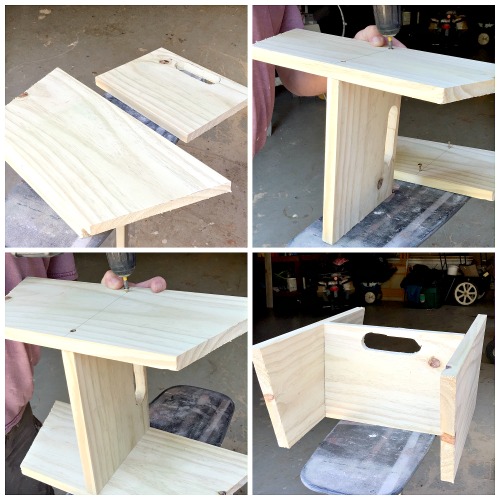
Cut your 1″ x 8″ board to mimic the inside dimensions of your barrel into 3 pieces for compartments. For the handle, draw an oval and cut with a jig saw. Secure all pieces together with carpenter screws. Secure each side to the top and bottom of the middle board. I used stain on my finished piece.
Finished project and extras
Stock up the caddy and fill it up with your favorite campfire goodies, beverages and blankets. Wine optional.
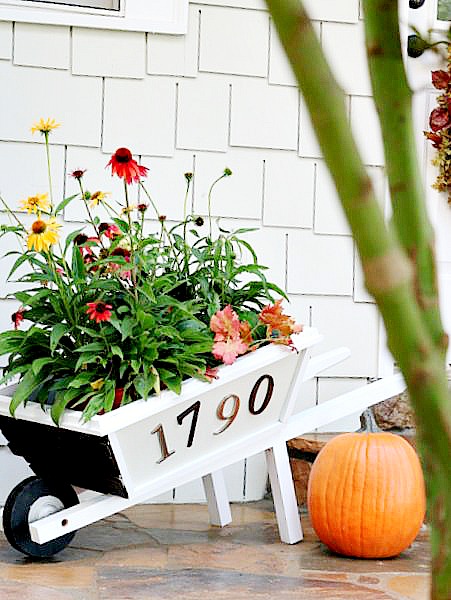
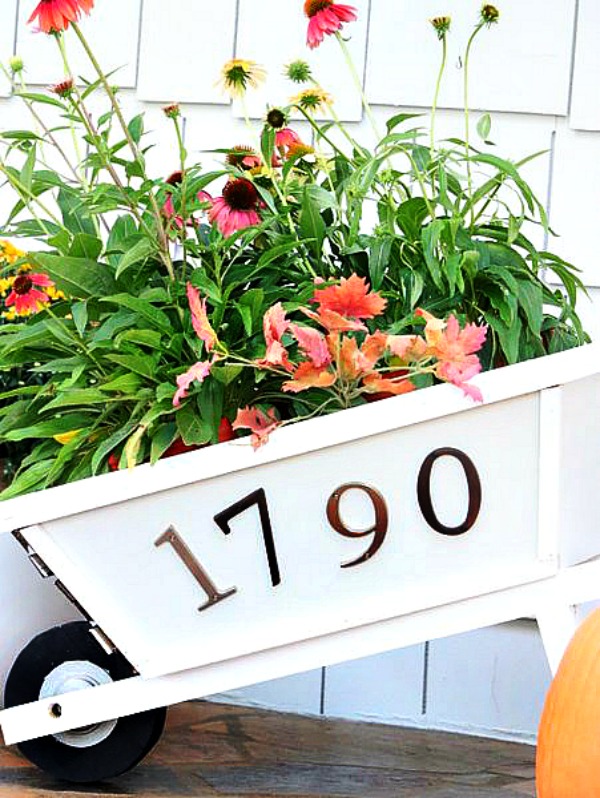
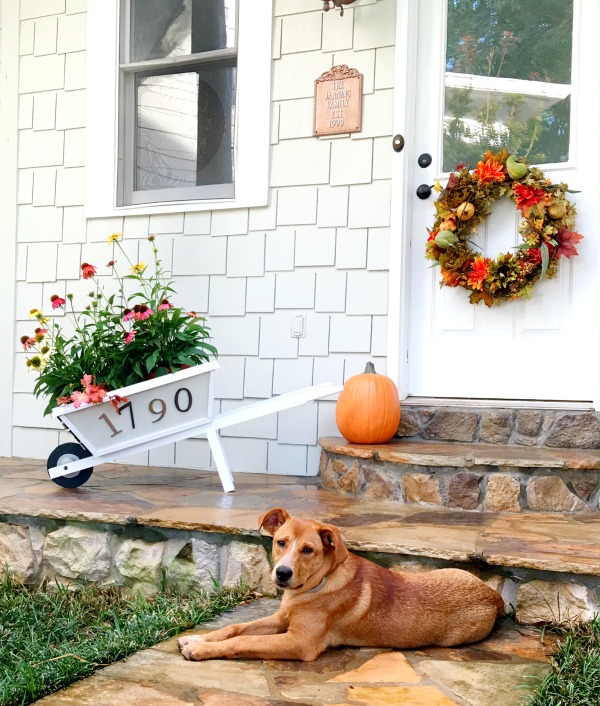
In addition to the campfire caddy, I also personalized the planter side with some house numbers just in case…….
Peanut the new puppy gets lost and has to find his way back home.
Don’t forget that this Thursday, September 15th from 6:30- 8:00 pm, you can go to your local Home Depot to get the materials, tools and all the necessary instruction to build this Rustic Wheelbarrow as well as getting more information about all of the workshops that The Home Depot offers.
You can also register for the free workshop at your local Home Depot workshop here.

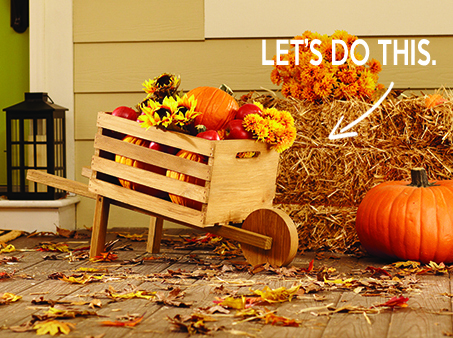
Ready to get this party started! Click on the links below to get more amazing ideas on how to create your own Rustic Wheelbarrow.
NewlyWoodwards
Keeping It Cozy
The Chronicles of Home
House of Wood
Remodelando La Casa
Pneumatic Addict
The Home I Have Made
Chatfield Court
Homemade By Carmona
My Love 2 Create
Place of My Taste
DIY Huntress
UnCookie Cutter
Sawdust 2 Stitches
Cozy Little House
Love of Home
Duke Manor Farm
Field Treasure Design
Tinsel and Wheat
That’s My Letter
Build Basic
Addicted 2 DIY
Build Craft Love
Averie Lane
To see more of my Fall projects. click here.

grateful
for new critters around Duke Manor Farm
*I acknowledge that The Home Depot is partnering with me in this sponsored post. I received compensation in the form of products and services, for the purpose of promoting The Home Depot. All expressed opinions and experiences are my own.

A campfire caddy! GENIUS! What a great idea – and I love the planked exterior.
thanks Kim.
Wow, Laura, I love them both. Look at you building a wheelbarrow!!
who knew I had mad wheelbarrow skills!
I totally ADORE your two versions of the wheelbarrow! Well, if I have to choose, I’ll take the white pretty planter, so stinking CUTE! It was so awesome to work with you on this workshop, Thanks!
How cute! Love that it’s multi-purpose!
Brenda
thanks brenda!
I love your updates on this project – and the built-in caddie is just so brilliant! Great job!
I love this!! I’ve been wanting one, but store bought in this size is expensive! I need to take this class!
since I am now a wheelbarrow professional…I will make you one
that is the cutest thing ever!!! I need to make one!
So Cute! I love it with your house number!!
So cute Laura! Love how you shared two different options.
Okay, you lost me at the Wood Dowel for Wheel instruction, but am loving these great wheel barrel ideas you created! 🙂
Love the wheel barrel planter – multi-seasonal – perfect and fun! 🙂
I love your multipurpose ideas! You are always so creative! The campfire caddy is just too cute – I LOVE it!!
Love the contrast of the dark stain with the white on the campfire wheelbarrow! Super cute idea!
I love them both won’t be able to choose a favorite and the fact they are fairly easy to make I will have to try and hope mine comes out as well thanks for sharing
Love the two options….such a cute wheelbarrow for all kinds of uses!….Great job!…Love the house numbers too!
Love the wheelbarrow! You did an awesome job, Laura! I’ve been looking for a wheelbarrow, but they are quite pricey! I guess I need to sign up for the workshop.
Cute ideas, campfire caddy is great. Congratulations on your new addition “peanut ”
Pat