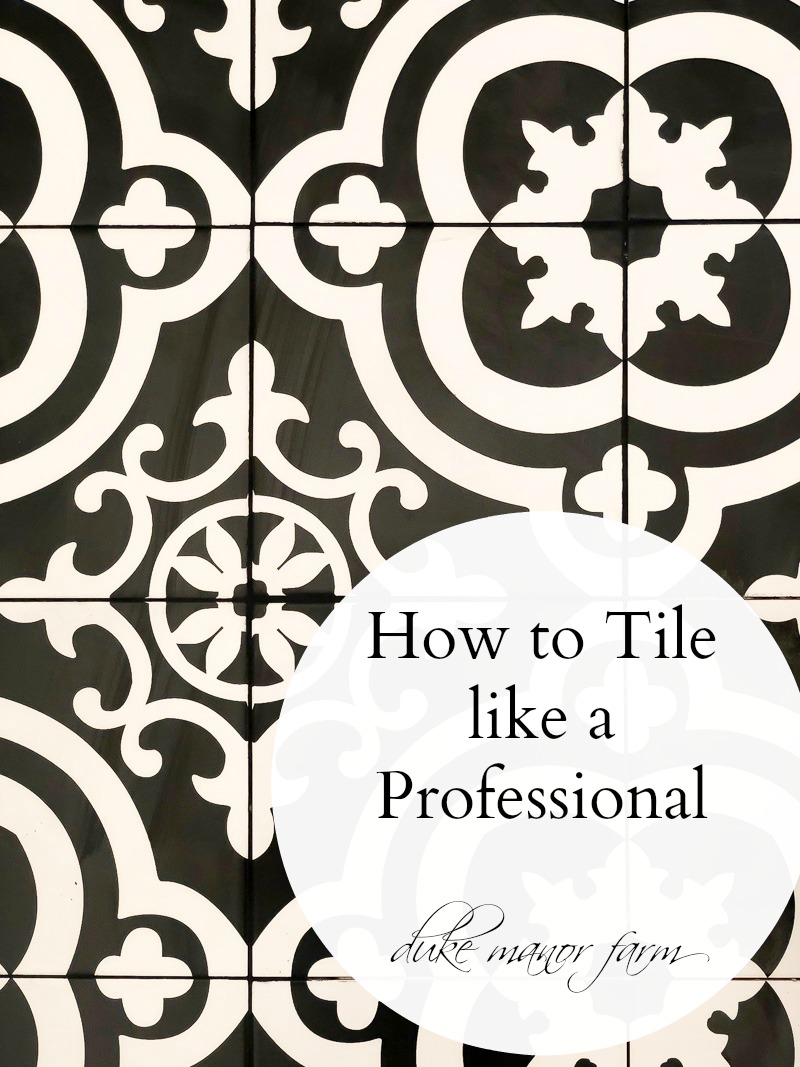
How to Tile a Bathroom like a Pro
How to Tile a Bathroom like a Pro with a few of my favorite tiling tips.
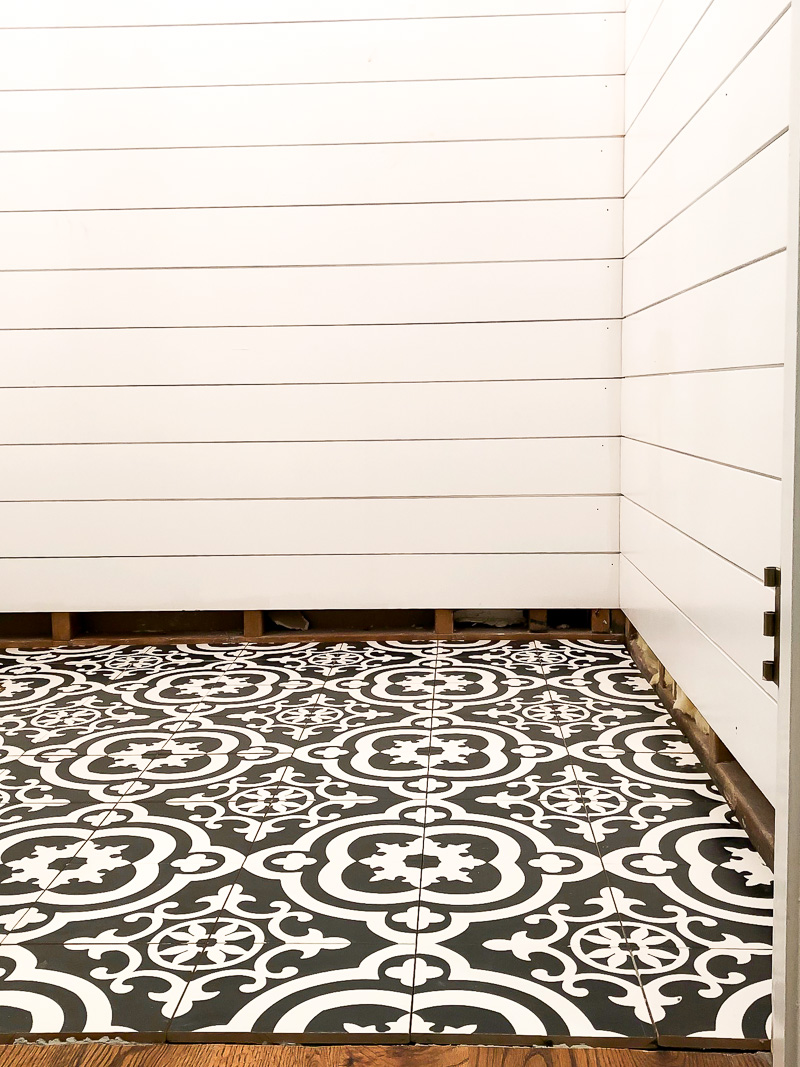
If you have been following our guest bathroom renovation, one of the changes we wanted to make was to the floor. We had some minor water damage ( from water runoff on the vanity) We also had a smell from little boys growing up using this bathroom. That smell permeated into the cracks of the wood. Regardless of how much I cleaned the floor, the smell just never went away. If you have boys…and wood floors you get totally get it. BTW- I don’t think I would ever do wood floors in a bathroom again.
Here are a few DIY Tile tips that I use when laying tile
- Precision
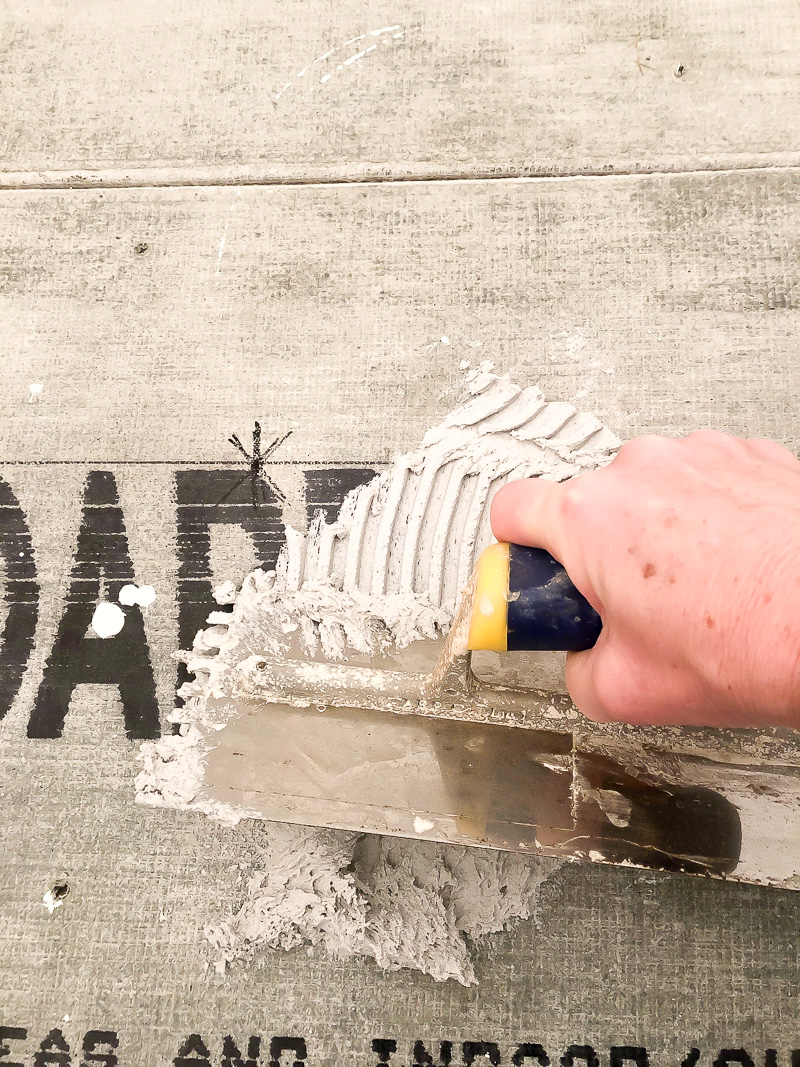
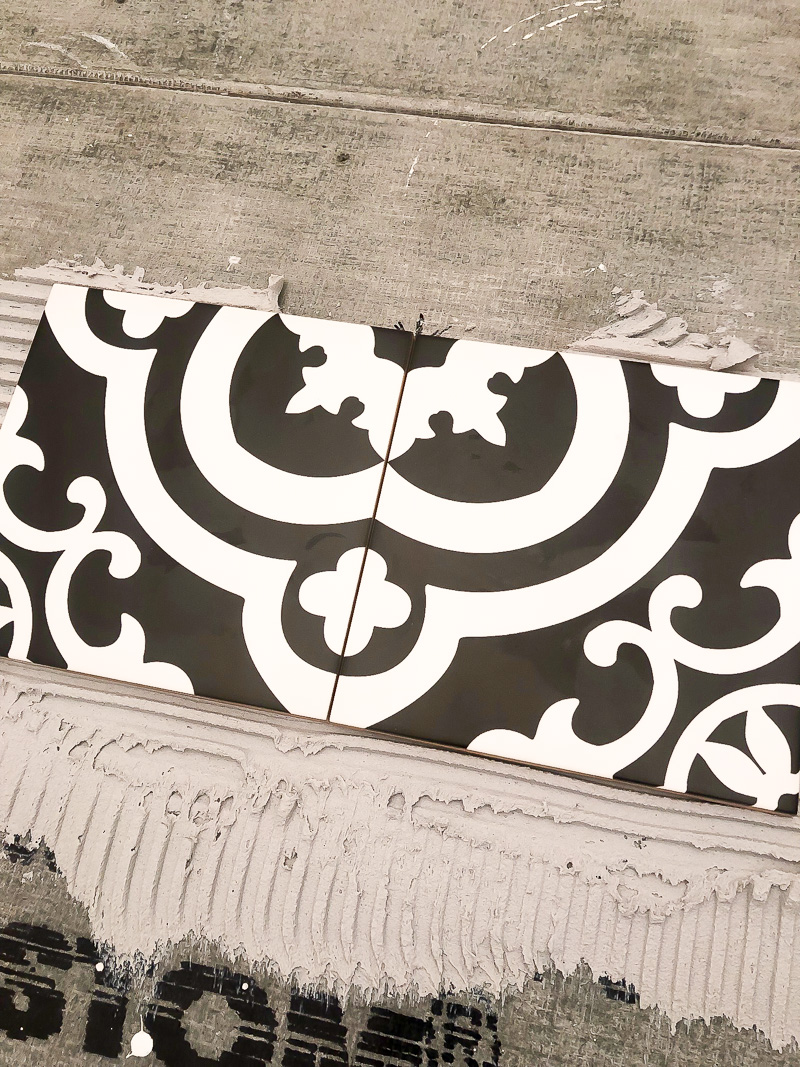
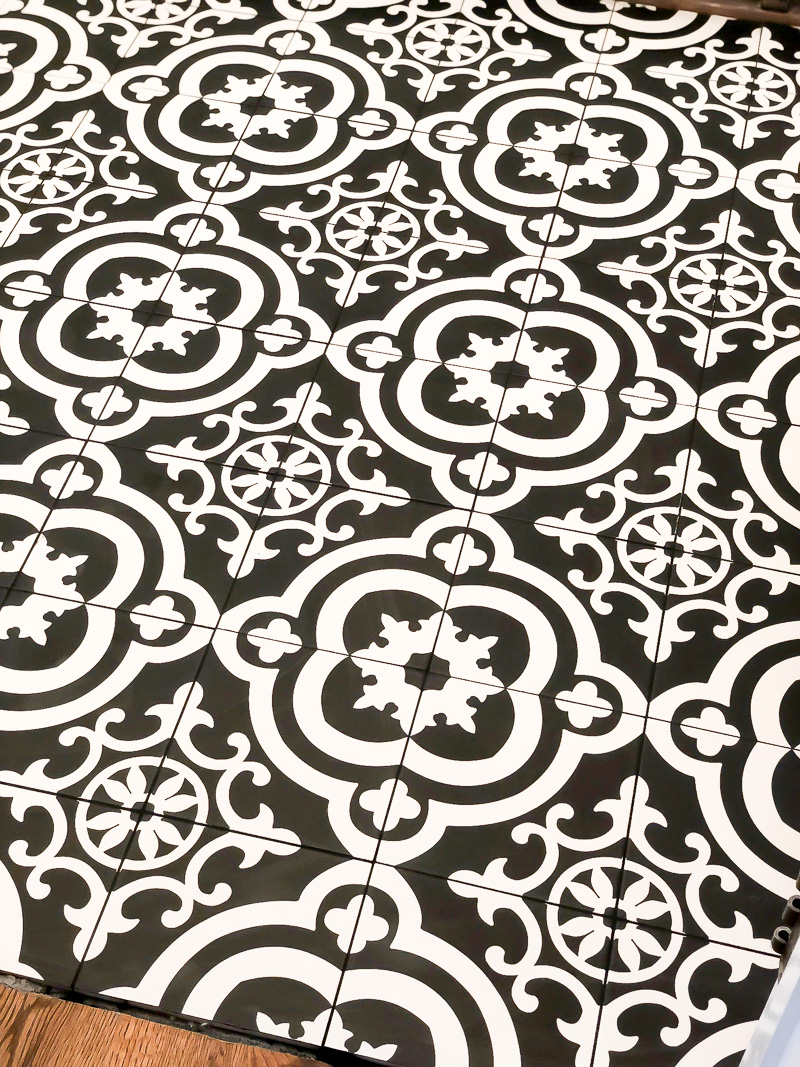
Since the area is small I decided to go with a bold pattern in the bathroom. Before applying the backer board I laid out the pattern on the floor. This allowed me to see the pattern before securing it to the floor with thin-set and confirmed that I had enough tiles before starting the job. After laying the backer board I measured the center of the room and marked where I would begin to tile.
- Measure, Measure, Measure
It’s always a good idea to buy a few ‘just in case’ tiles. Although I had them, luckily we got our cuts right and didn’t need them. I started in the center of the room and worked out from there. I used this approach because I wanted the pattern to be center in the space. If you are laying tile without a pattern I would start at one edge of the floor and work across.
- Save the harder cuts for last
We used our wet saw for cutting our tile and did it outdoors. Having a good blade will help with cutting straight edges and not chipping your tile. To get more exact with your cuts, outline the holes needed on the face of the tile. Cut as much as you can and then finish the cut from the back.
- Don’t Under or Over Grout
After you let your tile cure for at least 24 hours, you can apply the grout to your joint lines. Don’t get anxious. It’s better to wait and make sure that your tile is properly dried so you don’t have shifting tiles down the road. When grouting it’s important to use just the right amount. You don’t want to under grout where it doesn’t sufficiently fill your joint line. You also don’t want to over-grout as there will be more grout to remove and clean up. I do my grouting in sections. Apply, clean, and dry.
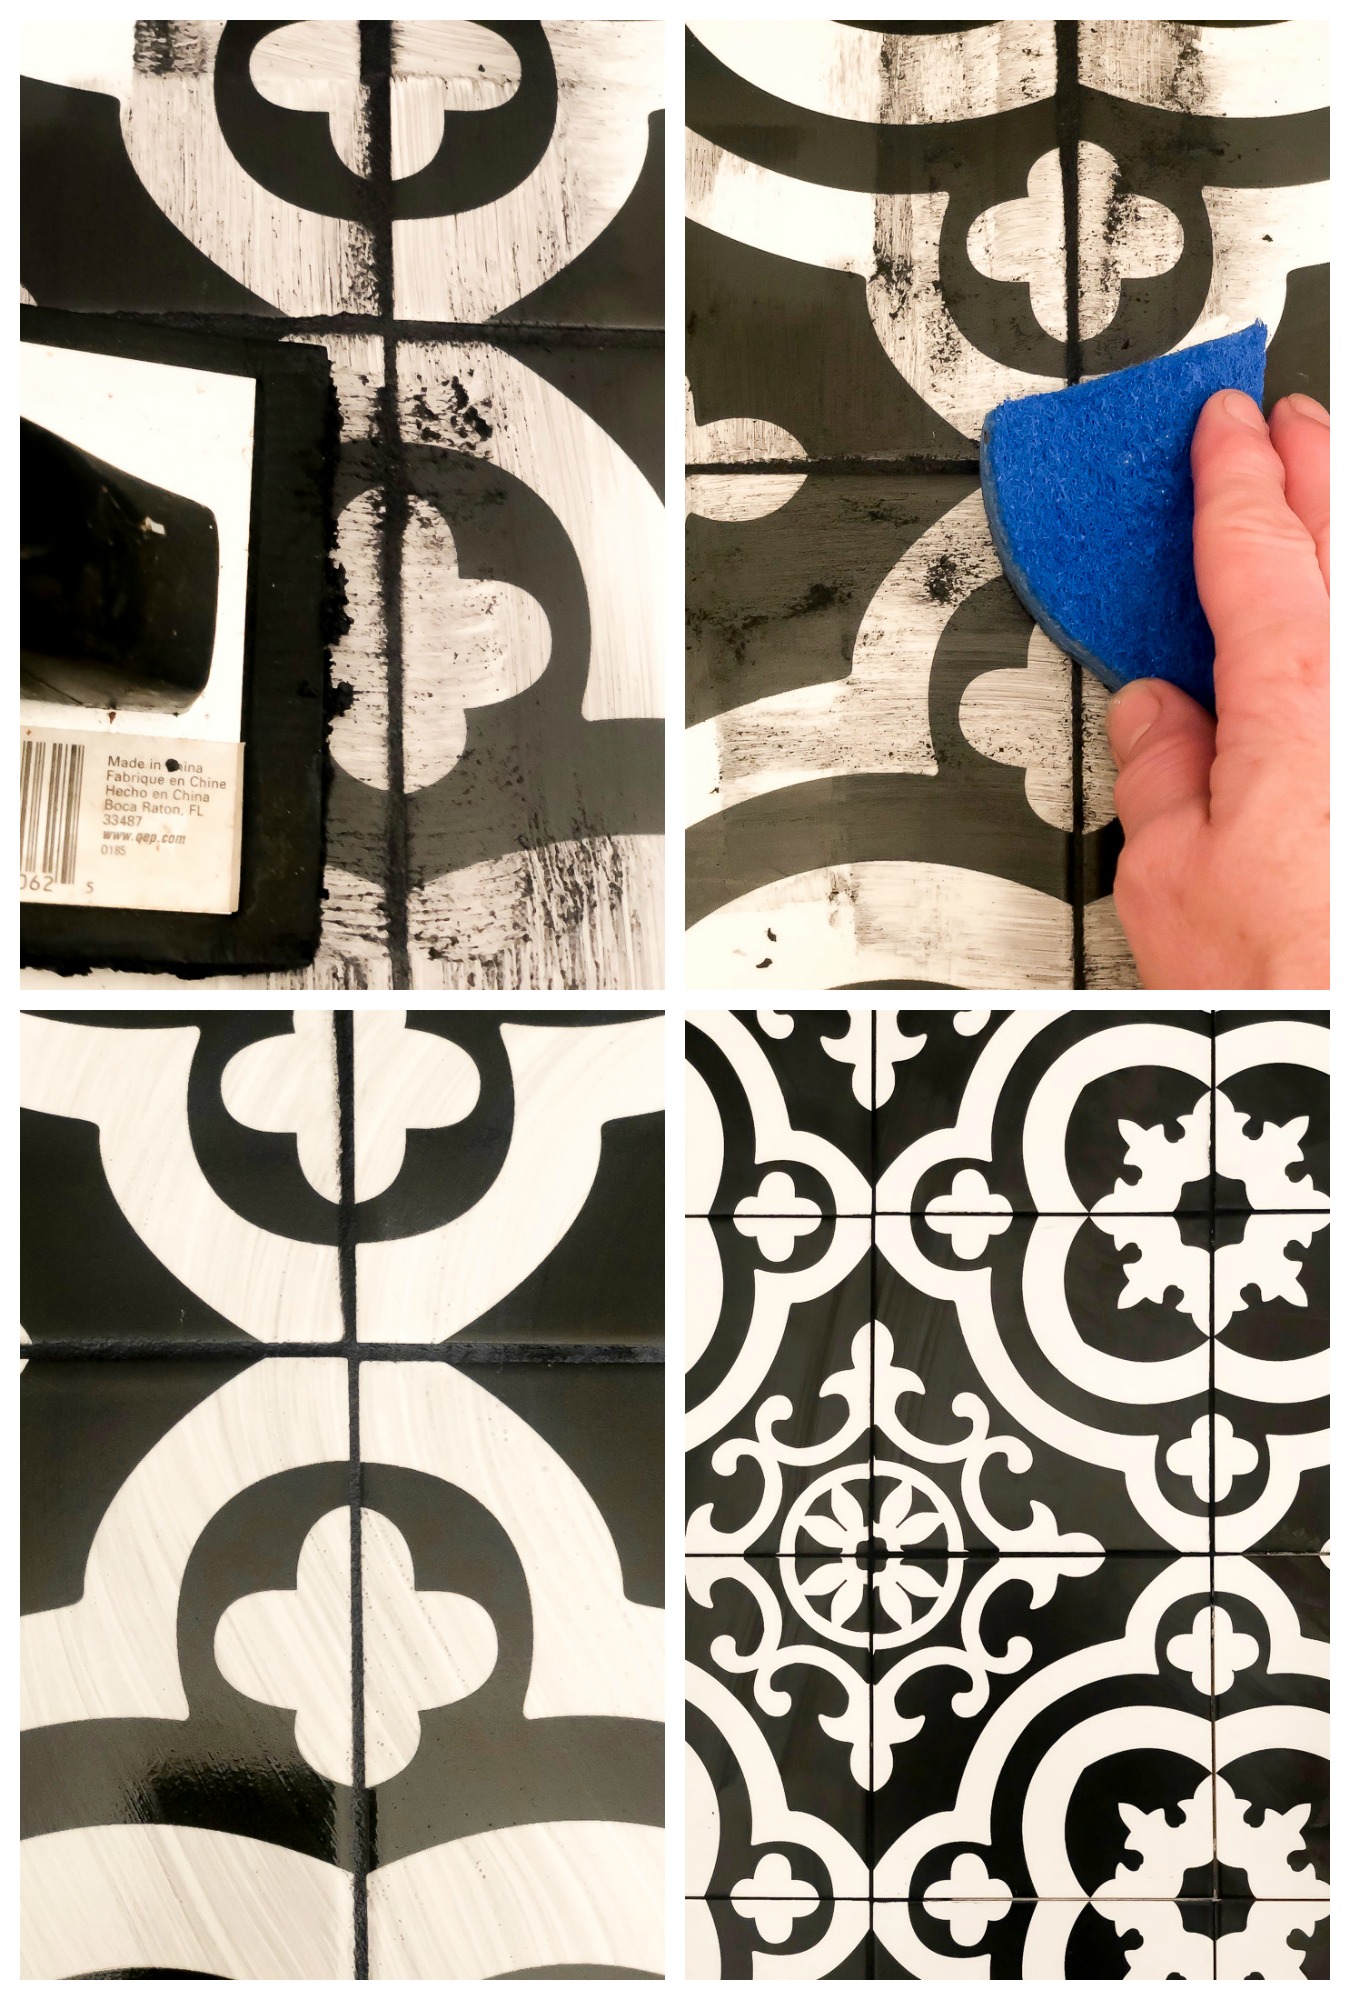
Apply your grout with a float using medium pressure. Wipe the excess grout with a sponge or rag. The idea is to clean up excess grout on the tiles and not from the grout lines. Let dry for a bit and then clean up the remaining residue with a soft rag.
Although I am not a professional tiler and don’t plan to be anytime soon, using these DIY tile tips made my job look like it was done by a pro. I am excited to show you more progress on the bathroom after we get the trim and the rest of the plumbing complete. Don’t forget to sign up for my emails ( see below) or on social media here or here so you won’t miss anything!
Have you tackled a tile job recently or left it to the professionals to do?

grateful
for an amazing DIY partner…my hubby


Look gorgeous!!
thank you. can’t wait till you see it.
Laura, you are just so amazing — and a real pro! You make this job look so easy! The tiles look great and love the tile you chose. Your bathroom is going to look so nice once you are all finished. Have a great week!