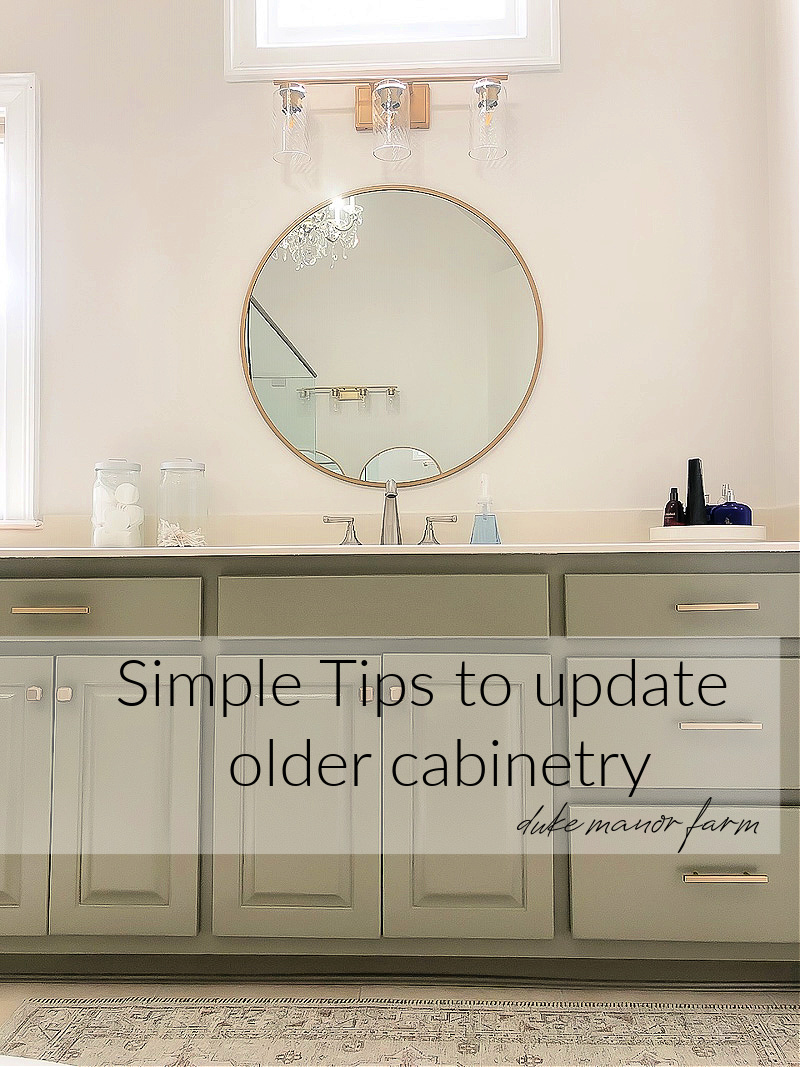
Simple tips to update older cabinetry
Simple tips to update older cabinetry including changing the color and replacing hardware for a modern updated look
How we got here
Part of the plan in my master bathroom was to update the bathroom cabinetry with paint and install new hardware. Here’s the back story to get you caught up:
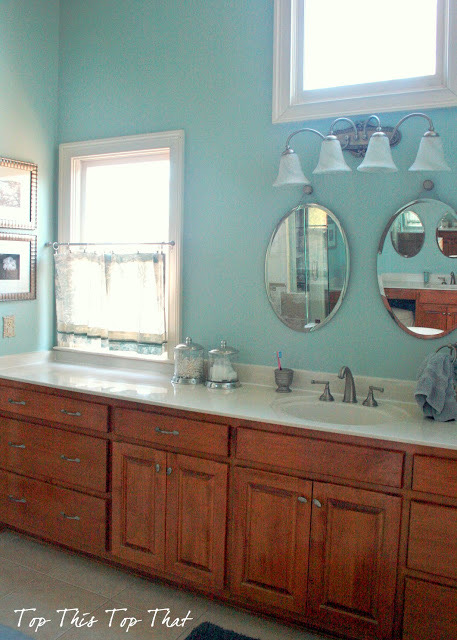
The original custom cabinets that I had installed when we built the house in early 2000 were stained. You know when red and gold were happening. Over the years when the reddish color hue no longer worked with my taste I threw some blue paint on them and called it a day. It satisfied me for a few years. During that time we talked about doing some significant changes in the bathroom… but that didn’t happen. Fast forward a few more years till today when some kind of change was necessary to update the space without doing a full renovation. You can read the full plan here.
Before and after
Here are the original cabinets before they were painted (over) and new hardware was installed
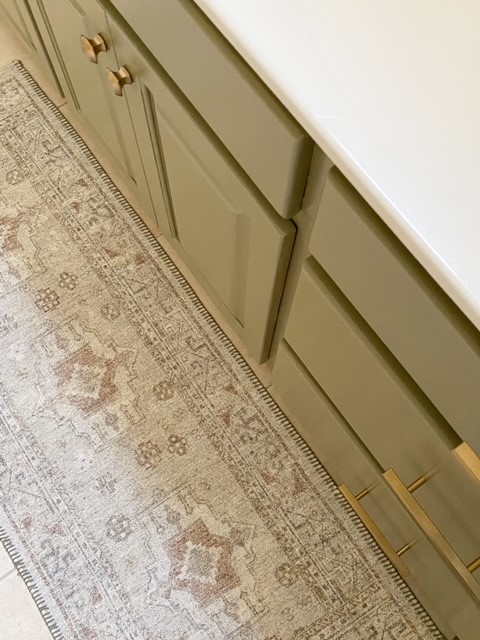
And after…stripping and removing all the paint, sanding, filling old hardware holes, painting, and adding new hardware.
Since these changes have to last a year or two I wanted the cabinets to be able to withstand all the action that the bathroom sees. I probably could have just primmed and painted the cabinets, particularly since I didn’t have any chips or peels. My inner voice told me to take it a step further and completely sand them down and start over. So I did.
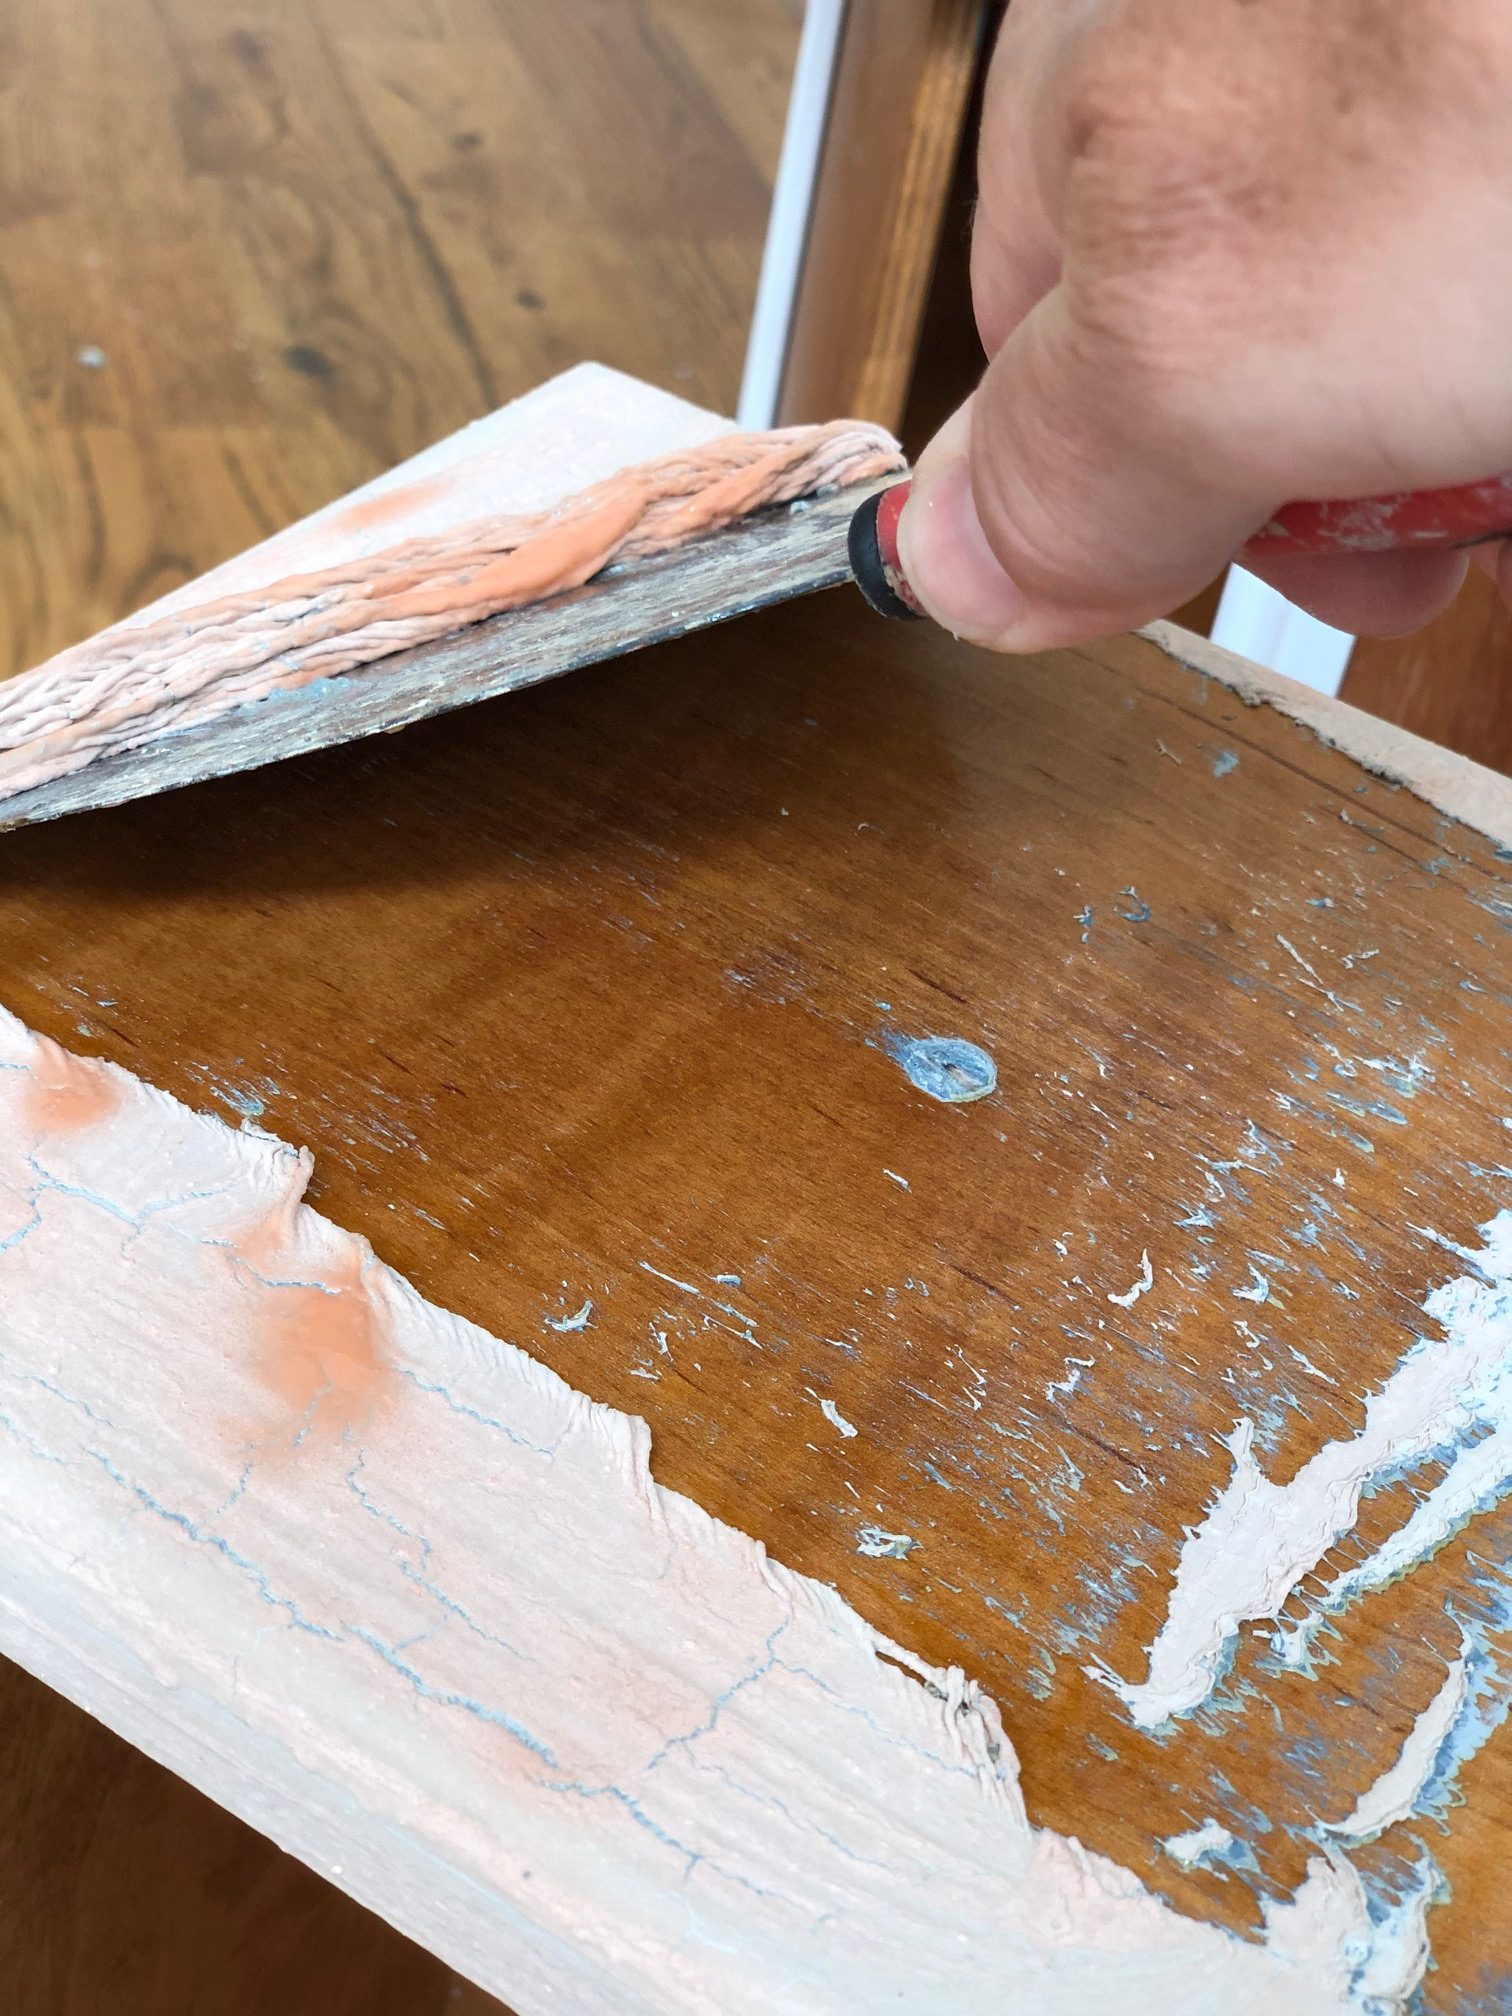
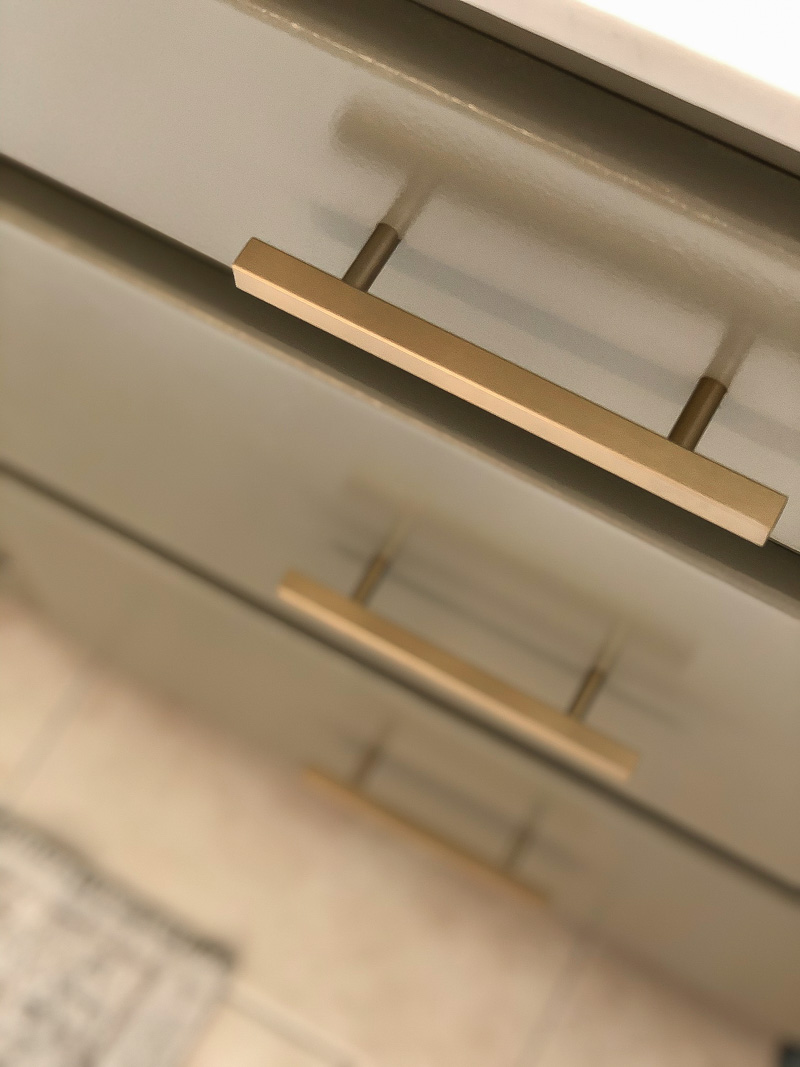
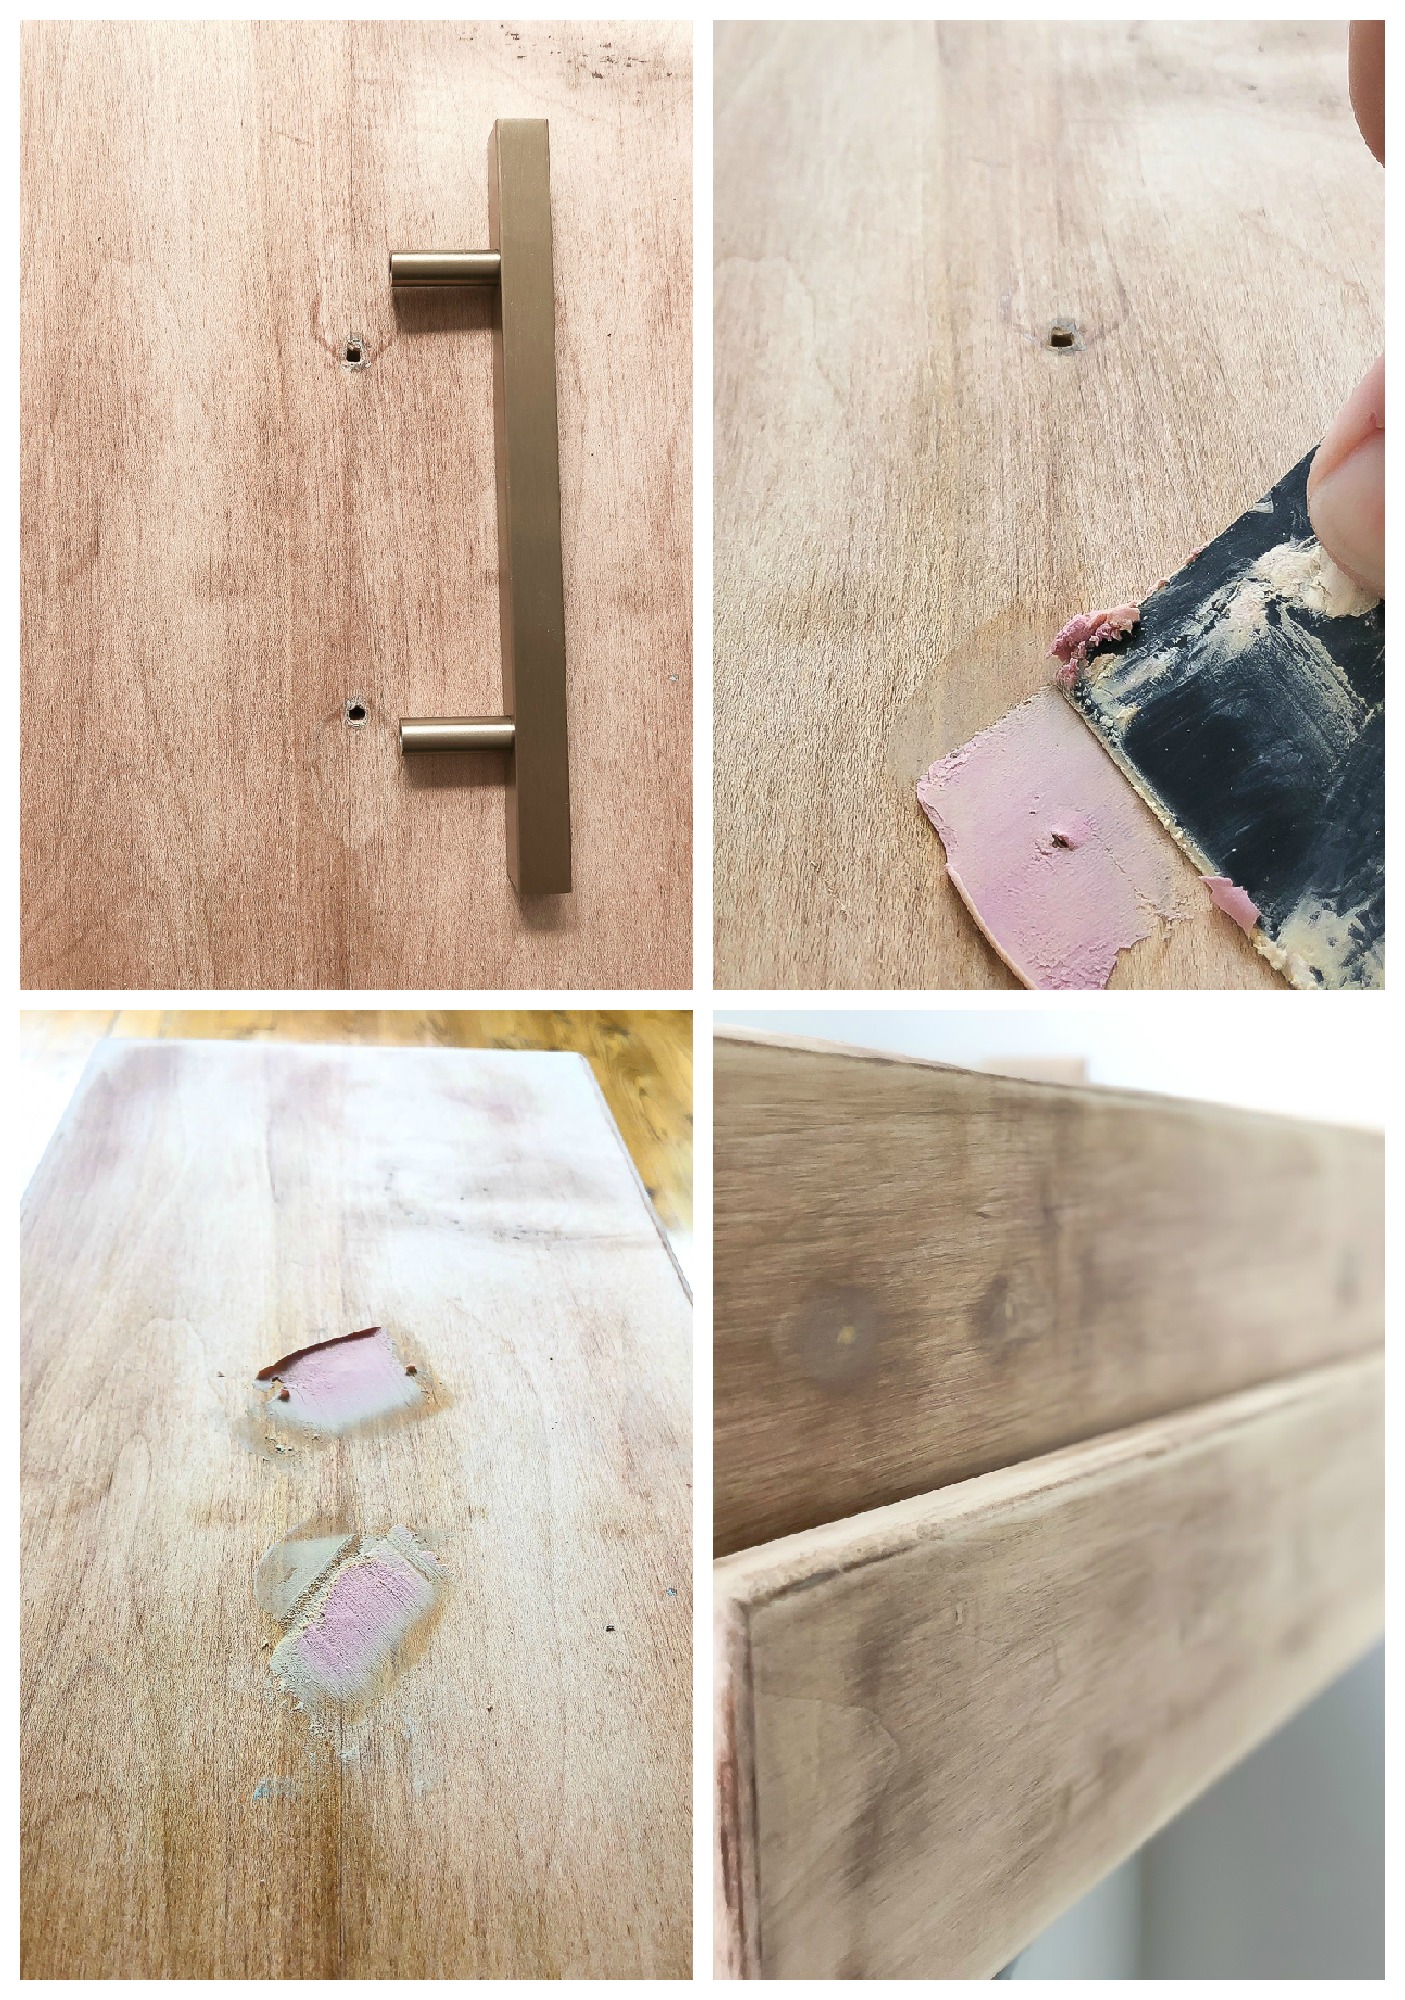
You can read all about how to remove paint without sanding here. I needed to address the current placement of the old holes and create new ones for the brass pulls that I got. I got these pulls and these knobs. The knobs were going in the same place so they just needed to be switched out.
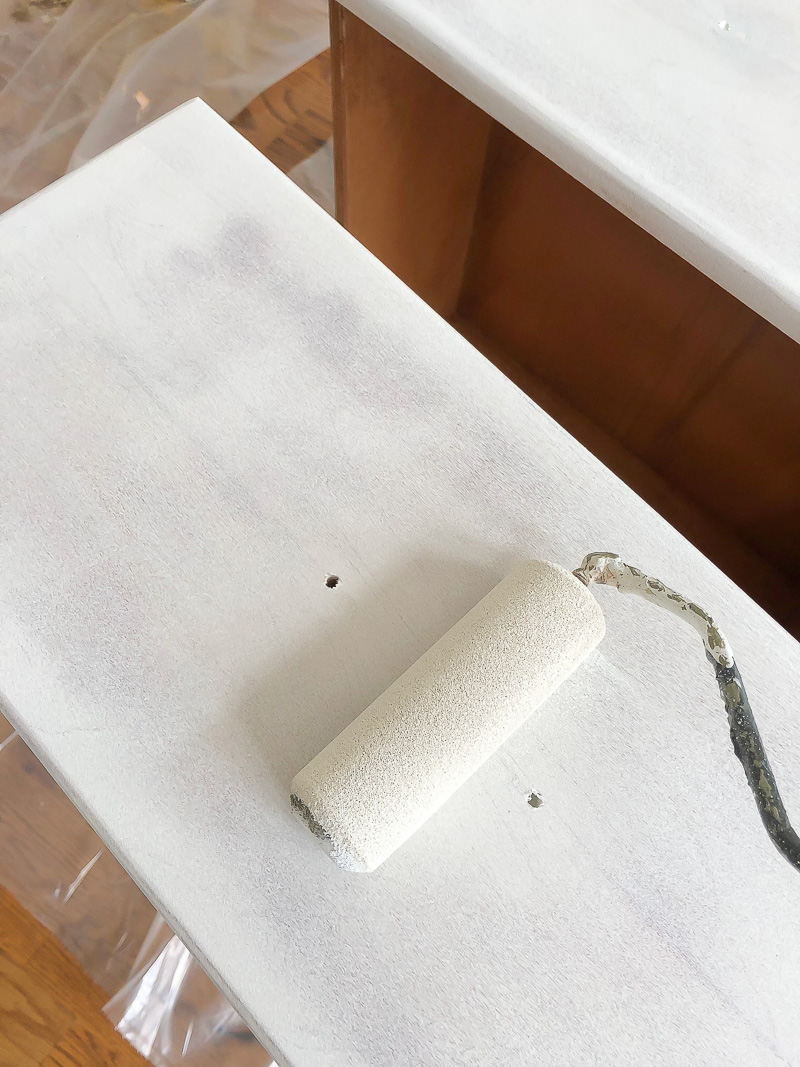
The spread of the new pulls was wider than the current holes so I needed to fill them in before I could measure and drill for the new holes. I used this color-changing wood filler and applied it with a small plastic putty knife. The wood filler will change from pink to a light beige when it is ready to be sanded. Perfect for impatient people like me.
Painting your cabinets
After sanding and wiping down the cabinets, I applied two coats of primer over the bare wood. Once dry, I used a small foam roller and applied two coats of my paint in a color called Mossy Bank from Behr. I used semi gloss finish but wish I had used satin for less of a shine. SInce the color change was a last minute decision I went ahead and had hubby pick up some Behr while he was at Home Depot. For cabinets and furniture, Sherwin Williams is always my first choice. Regardless, I still love how they look. Something else I wish I did, is to spray the cabinets instead of using a small foam roller. When we painted our kitchen cabinets here, we sprayed them and you can definitely tell the difference between spray vs. rolled. If you do roll your cabinets, use the smoothest foam roller you can buy. It will really make a difference.
Out with the old
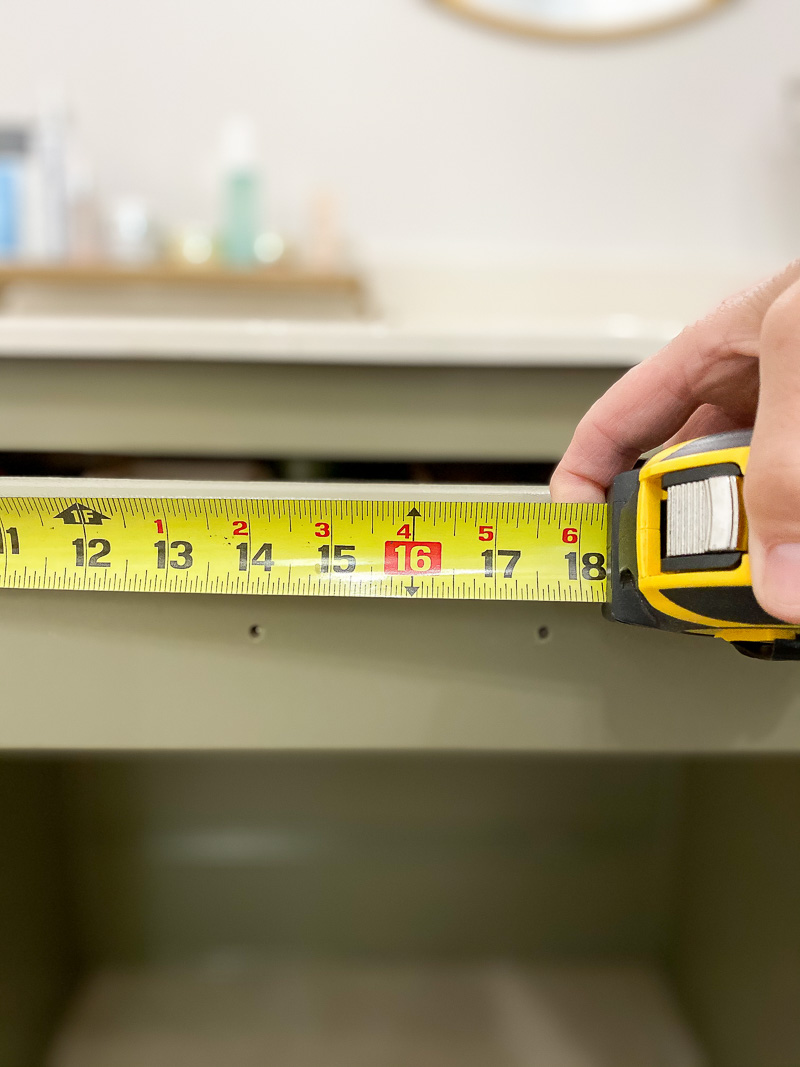
When the old holes were filled, it was time to make new ones. My hubby did this part of the project since he’s better at math. His biggest advice before you put holes in your cabinets is to measure once, twice and three times. In a nut shell: Put your hardware in position, measure and mark the center and then measure the distance between center and the placement for the holes. If you screw up you can also use your wood filler and start all over.
 I realize the extra step to completely remove all the paint/stain from the cabinets took more time, but now I know the cabinets should be tough enough to handle the space for a while. I am so excited to show you the final reveal!

grateful
for an updated space…under budget
This post may contain affiliate links for products that Duke Manor Farm uses, suggests or recommends to it’s readers.

Love all your advice on what you did with your kitchen cabinets. I need to do all that on mine. Great job!!!
What are your thoughts on the Rustoleum Paint kit for redoing cabinets. I’m planning on panting my kitchen cabinets and this seems like an easier way to go about it. The reviews are great. Let me know because I want to do it right. My kitchen cabinets are very old Oak wood and I have a lot of them.
Thank You Patti
How about refacing? All new doors and drawer fronts and new veneer over all exposed areas. A facelift for your kitchen and bath cabinets