A Step-by-Step Guide to Refreshing Grout Lines with Grout Pens
Revitalize tile that is old and discolored and give grout lines a refresh by using grout pens. A simple and budget friendly option to renew your tiled floors.
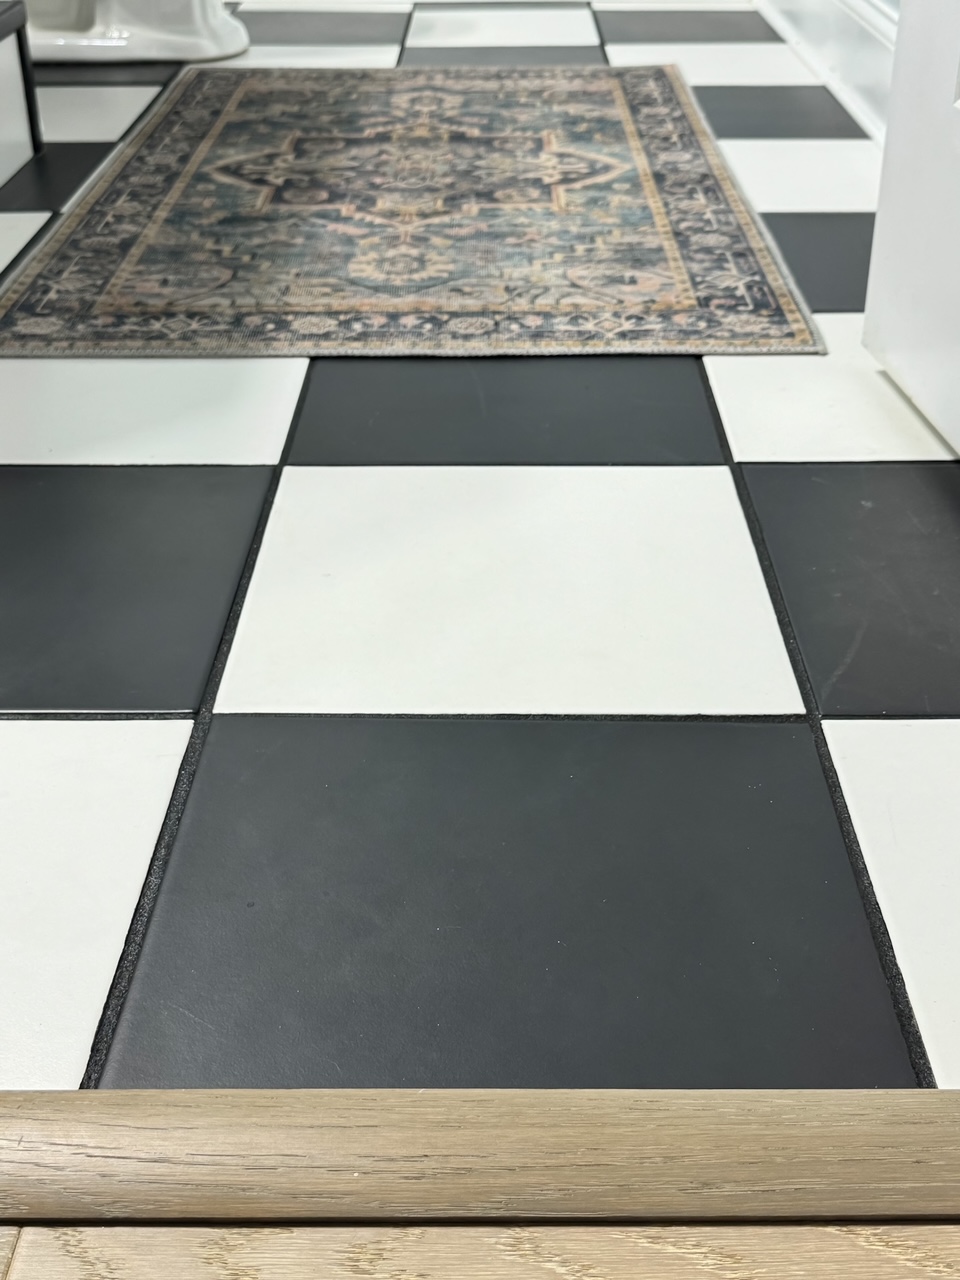
I knew the day would come that I would have to address the grout lines on my 22 year old tiled floors in the boys bathroom and guest bath. Since the boys bathroom had white tile and white grout and desperately needed a refresh, I started there. The result was nothing short of amazing and the process was so simple using the white grout pens. I couldn’t believe how good the floors looked.
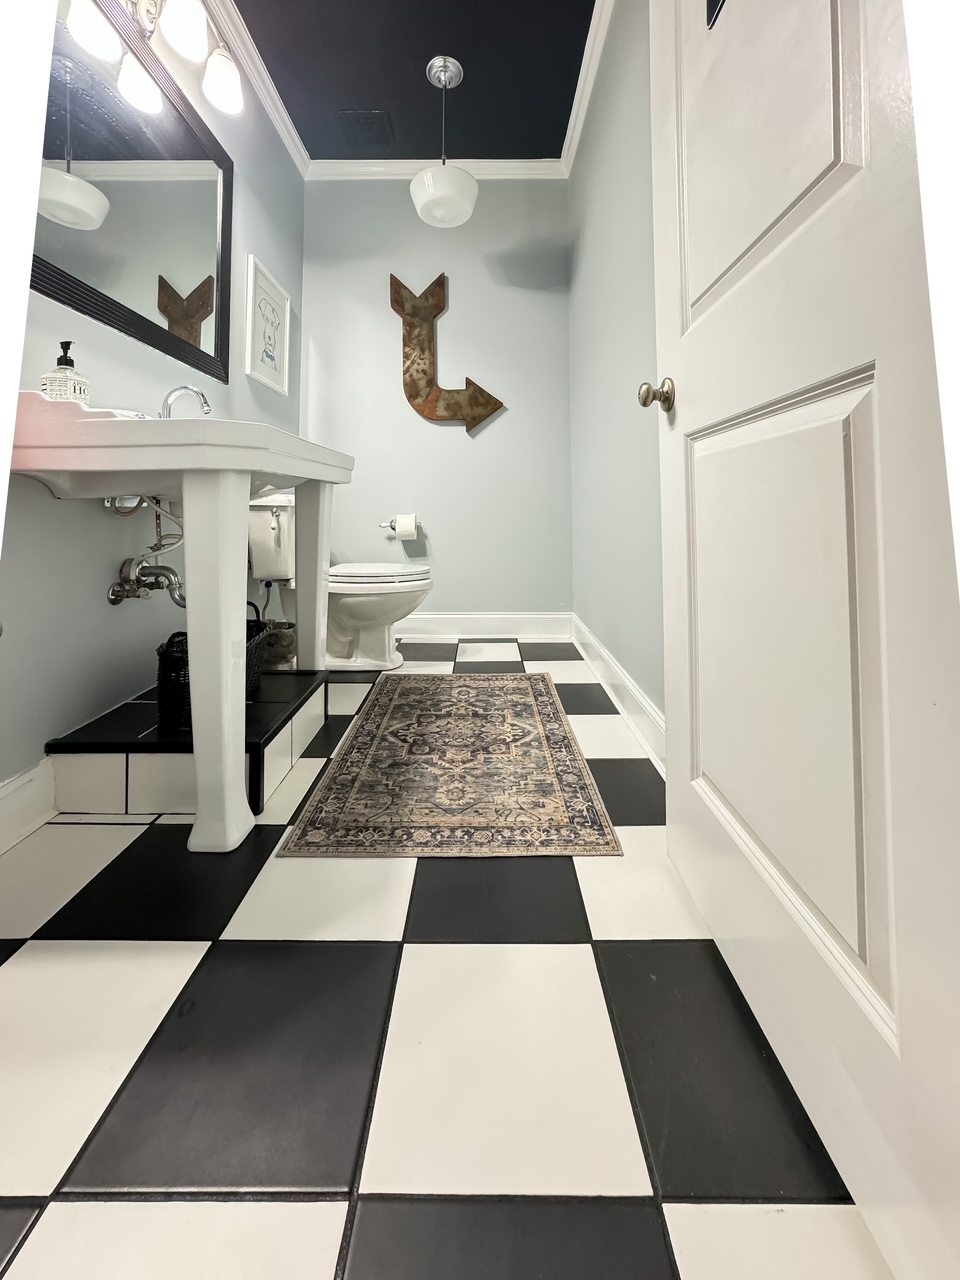
A few months back, I decided to give the grout pens another workout. I used them on the floors in the guest bath. This time on black grout. Amazing. It’s like witnessing magic from a grout pen, while breathing new life into your tiled surfaces all without the hassle and expense of having to regrout. Yes please!
I am going to walk you through the step by step process, resulting in a refreshed and rejuvenated look for your tiled space.
How to use grout pens
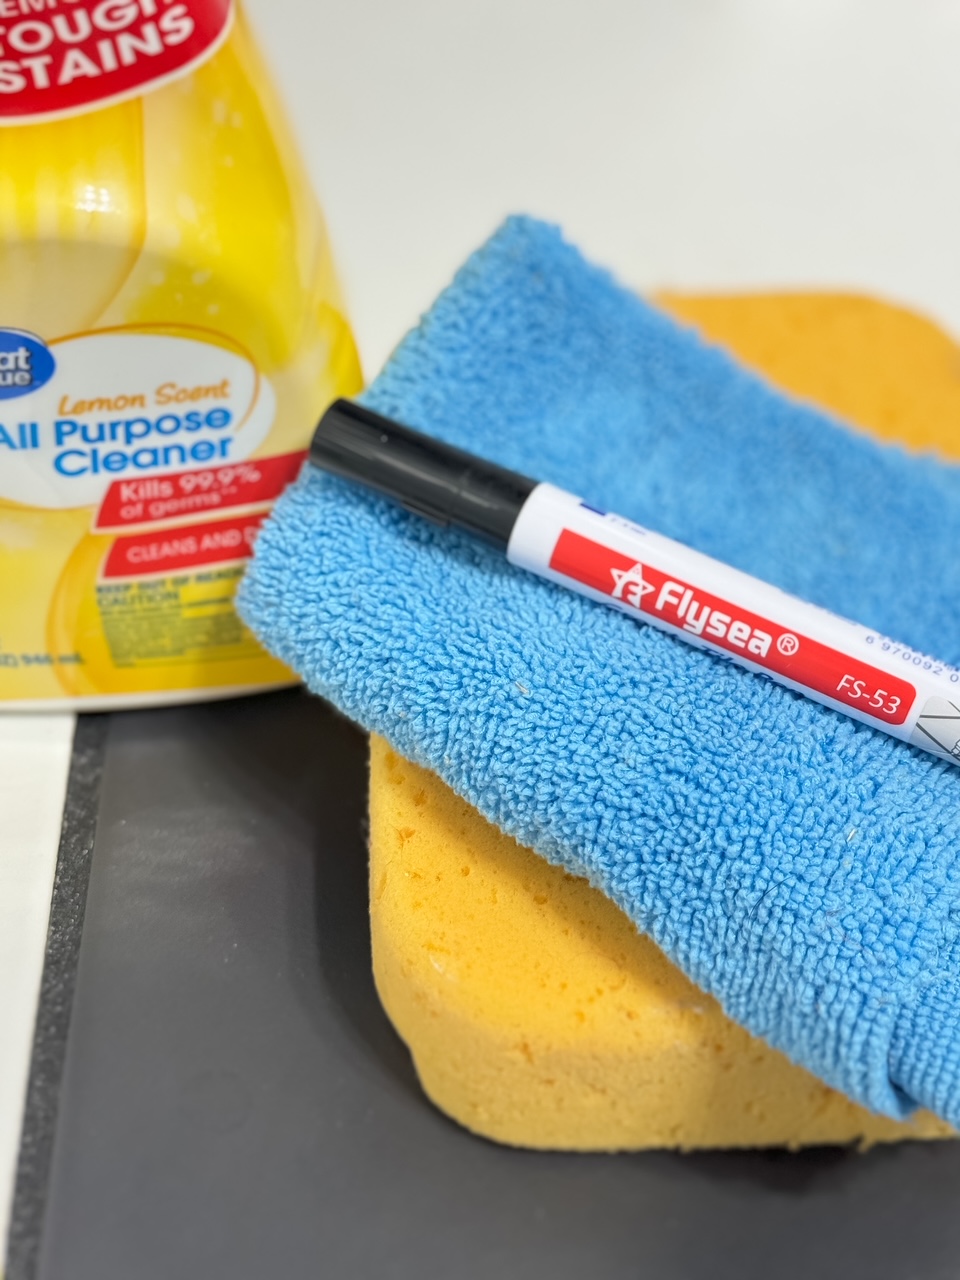
Step 1: Gather Your Materials
Before you begin, make sure you have all the necessary materials on hand. You’ll need:
Grout pens in the desired color(s). For my latest project I used black grout pens.
All purpose cleaner
Gloves (optional). The grout pen will come off with soap and water if you don’t wear gloves. Clean, dry cloth
Step 2: Prepare the Surface
Start by cleaning your tiled floor and grout lines thoroughly to remove any dirt, grime, or residue that may have accumulated over time. Use a mild household cleaner and a scrub brush to scrub away any stubborn stains. Allow the grout lines to dry completely.
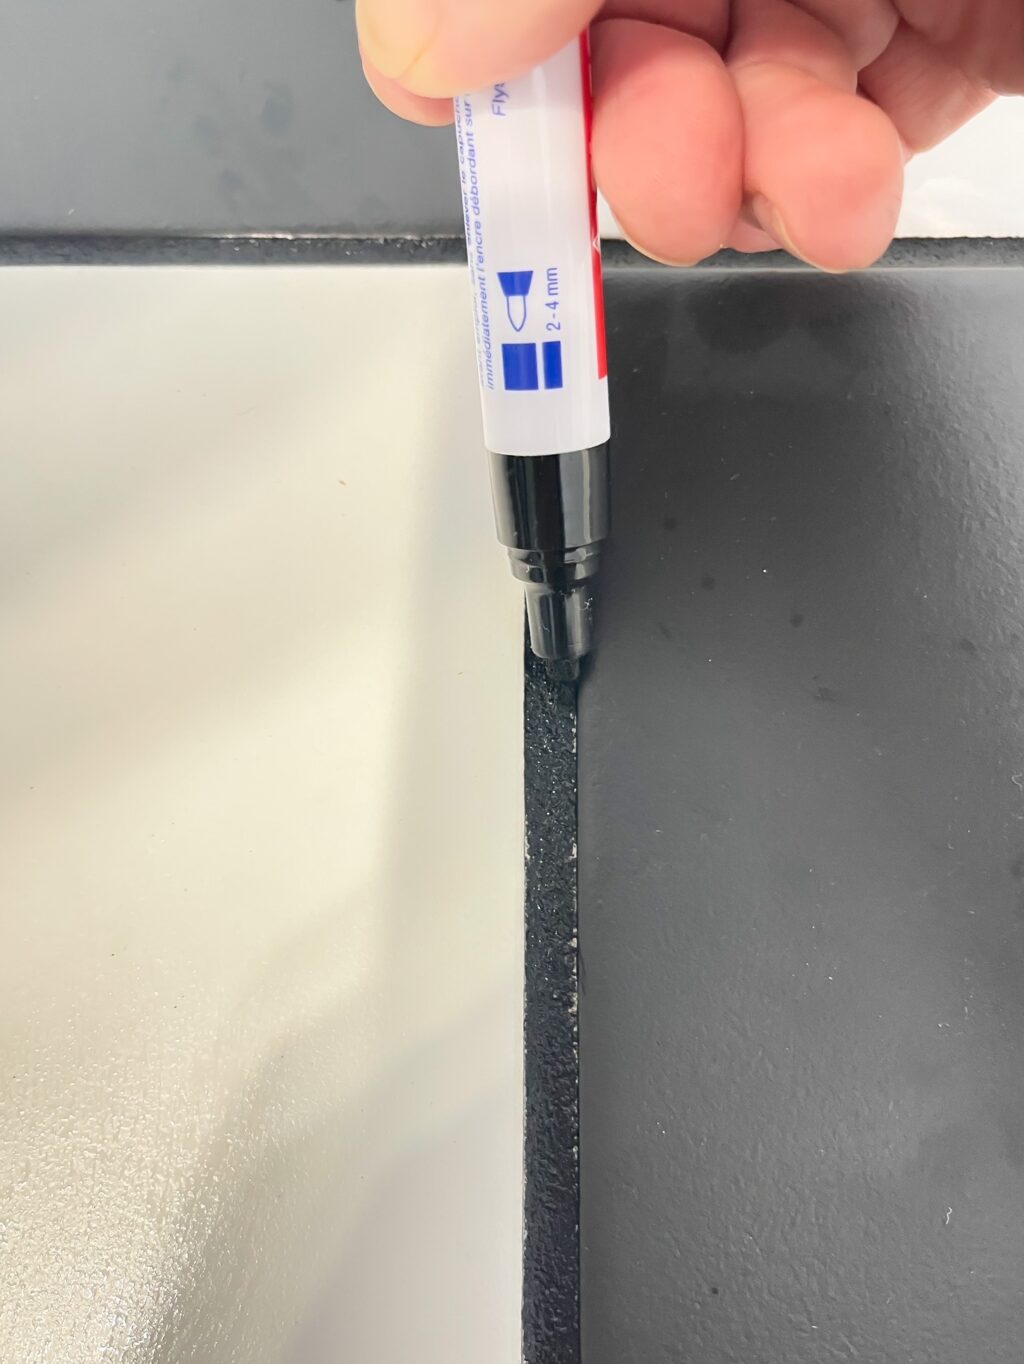
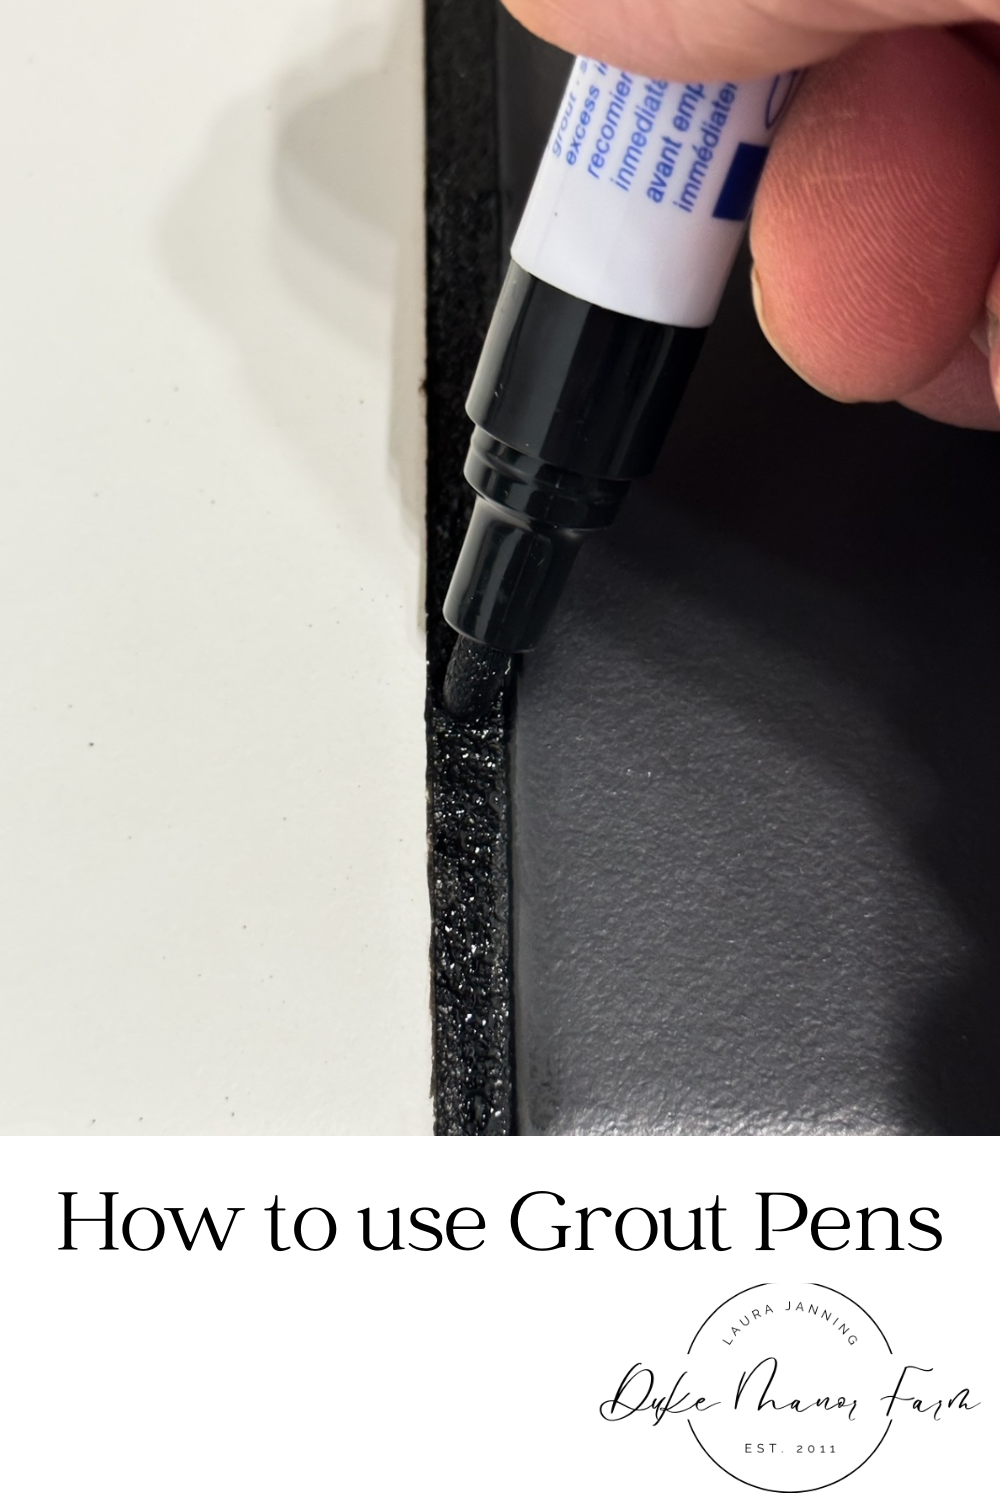
Step 3: Shake and Test the Grout Pen
Shake the grout pen well to ensure that the paint is evenly distributed. I like to test the grout pen out on a test area (piece of paper would work) to make sure the flow of the pen is consistent. This process is similar to use a sharpie pen or dry erase marker.
Step 4: Apply the Grout Pen
Begin applying to the grout lines in smooth, even strokes. Try to stay within the grout lines and avoid getting any excess pen on the tiles themselves. Albeit a lot more work, you could use masking tape to ensure clean, straight lines on your tiles.
Step 5: Wipe Away Excess
After applying the grout pen to a section of grout lines, use a dry cloth to wipe away any excess pen from the tiles. This will help to prevent any unsightly smudges or streaks.

Step 6: Allow to Dry
Allow the grout pen to dry completely according to the manufacturer’s instructions before using the tiled surface as normal. This typically takes anywhere from 24 to 48 hours, depending on the brand of grout pen and the temperature and humidity in your space.
One extra step
If you really wanted to go the extra mile on your refreshed tiled floors, you may consider sealing the grout lines after the grout pen has dried completely. There are many sealants available on the market specifically designed for grout, which help to prevent stains and discoloration and make future cleaning easier. I have used this sealer previously.
More Tile Tips
Turning white grout white again
Laundry Room Makeover with tiled floors
With just a few simple steps and minimal investment of time and money, you can achieve professional-quality results and enjoy a refreshed and rejuvenated space for years to come. Happy grouting!

This post may contain affiliate links for products that Duke Manor Farm uses, suggests or recommends to its readers.